1. There are different types of storage pools that SWIFT supports. You can create either local ZFS or cloud object storage.
2. A storage pool is a logical storage group created by SWIFT.
3. If you are performing a stage 1 sync, you must create a storage pool with an attached disk. Then your data will be backed up to the SWIFT local ZFS storage pool.
Point Covered
Create a storage pool
1. Login into the SWIFT dashboard, navigate to the Business Community & DR section tab, and select Storage Pools.

2. Now, click on the New button to create a local storage pool.
a. Give the Friendly Name as shown by the arrow in the snippet.
b. Select the Storage Manager Type as ZFS.
c. Under Block Device, choose any block storage that you have attached to your VM. Identify available disk and use that
d. Choose verbose mode to get additional details about the storage pool creation.
e. Then, you can press the Create button to create a local storage pool, as shown in the below screenshot.

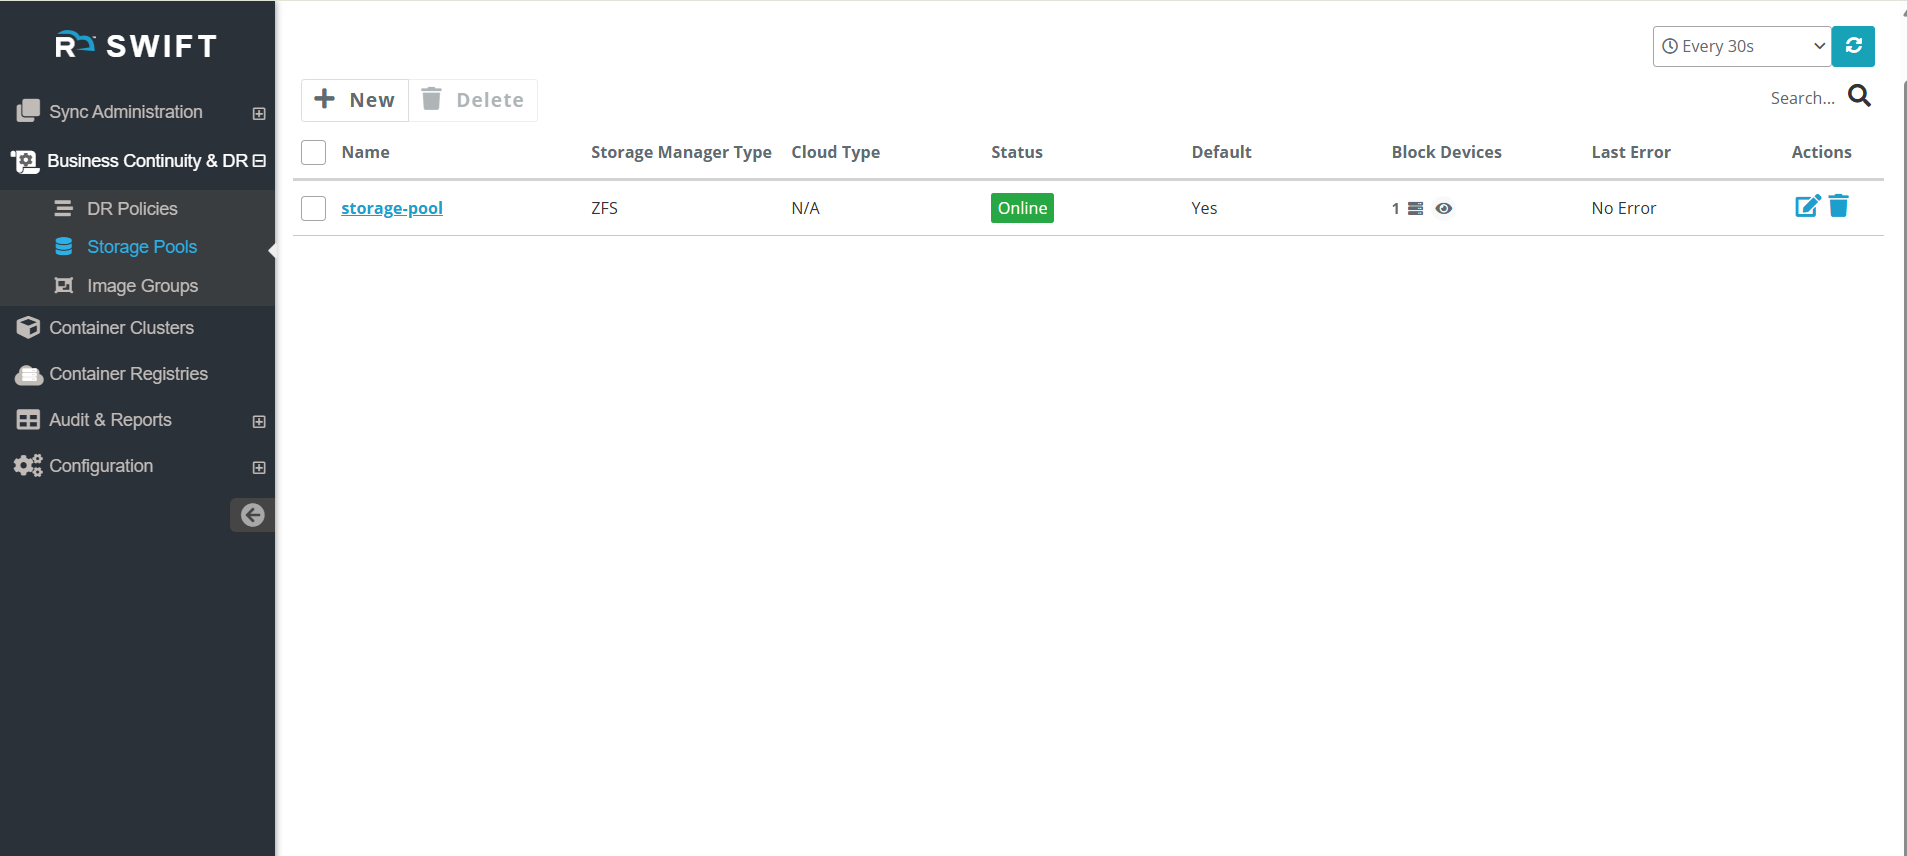
3. After creating a storage pool, you will see the storage pool name. If you expand it, you will see the storage type, status, associated block device, etc., under the Summary tab. Also, you can see other properties like Pool properties and Image groups.

Storage Pool details view
2. Click on the Storage Pool, and you will see the properties listed below. In the Summary tab, you can view details such as the storage pool name, status, total capacity (GB), used capacity (GB), created by, and other information.
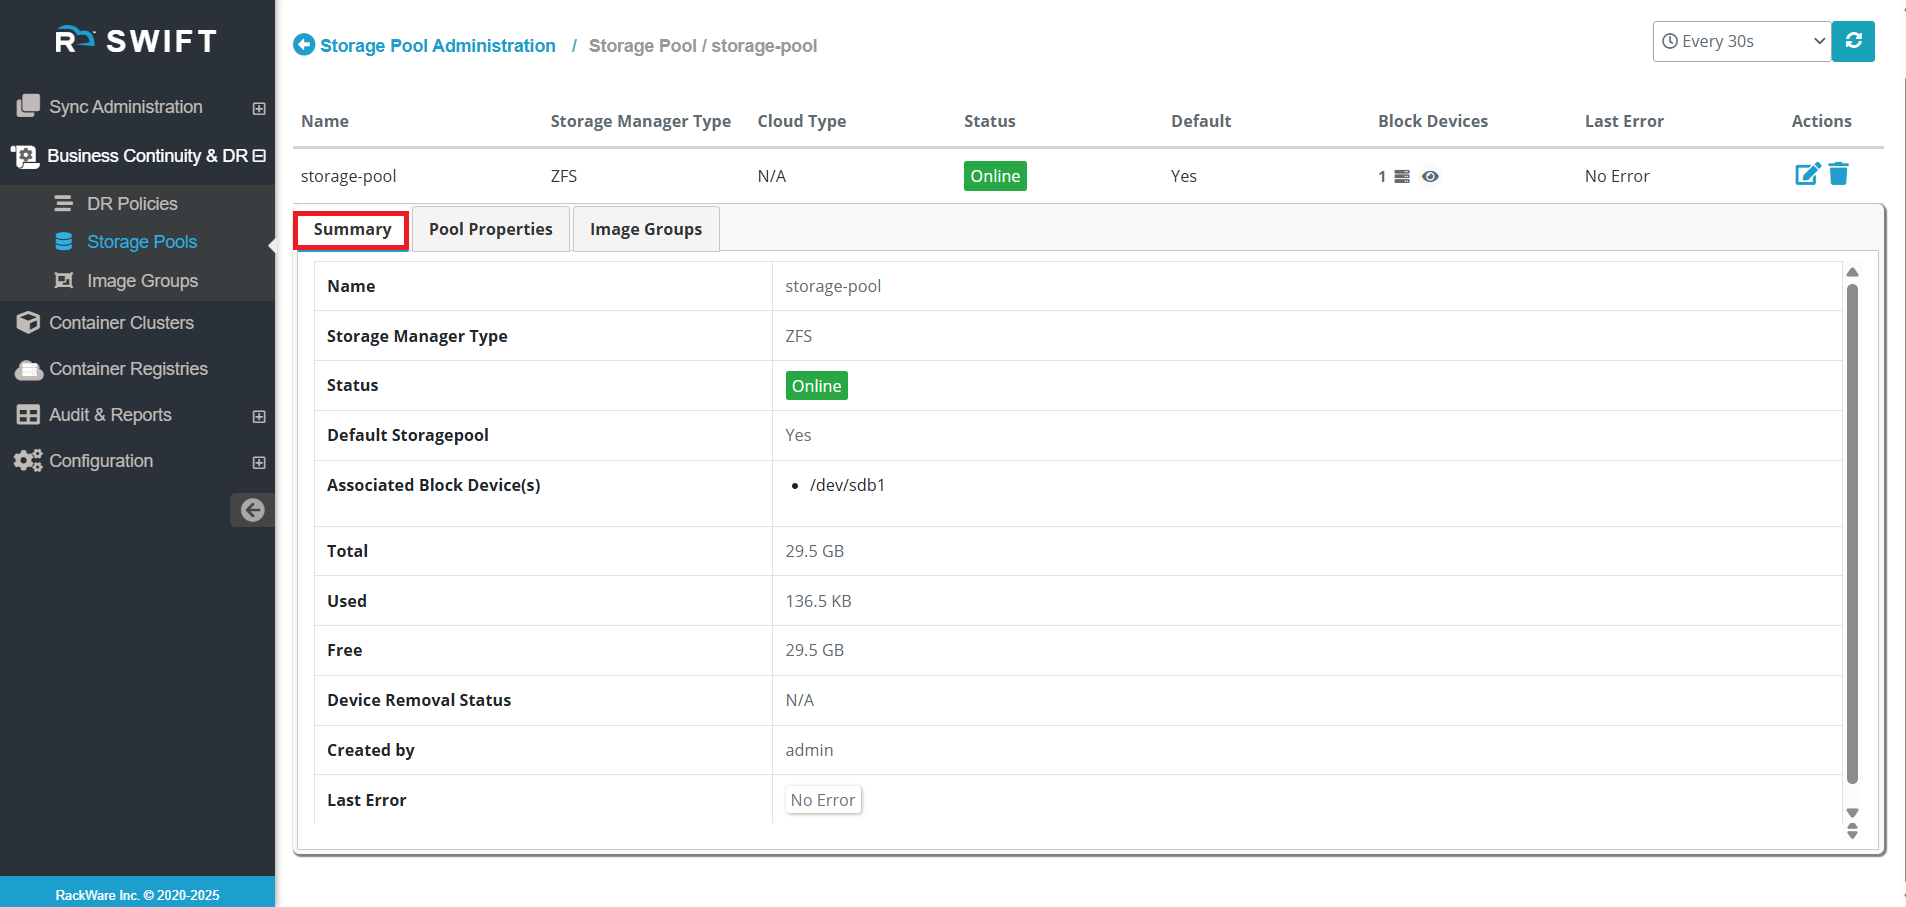
3. In the ‘Image Groups’ tab, you can see all the image groups created by SWIFT during the synchronization process.

Configure/Modify a Storage Pool.
3. As shown in the screenshot below, we have added an additional device to the pool. Similarly, you can remove a device by clicking on the ‘X’ icon.
Use Case:
If the current storage is full, you can add a new disk to the SWIFT machine and then use that disk to modify the storage pool.

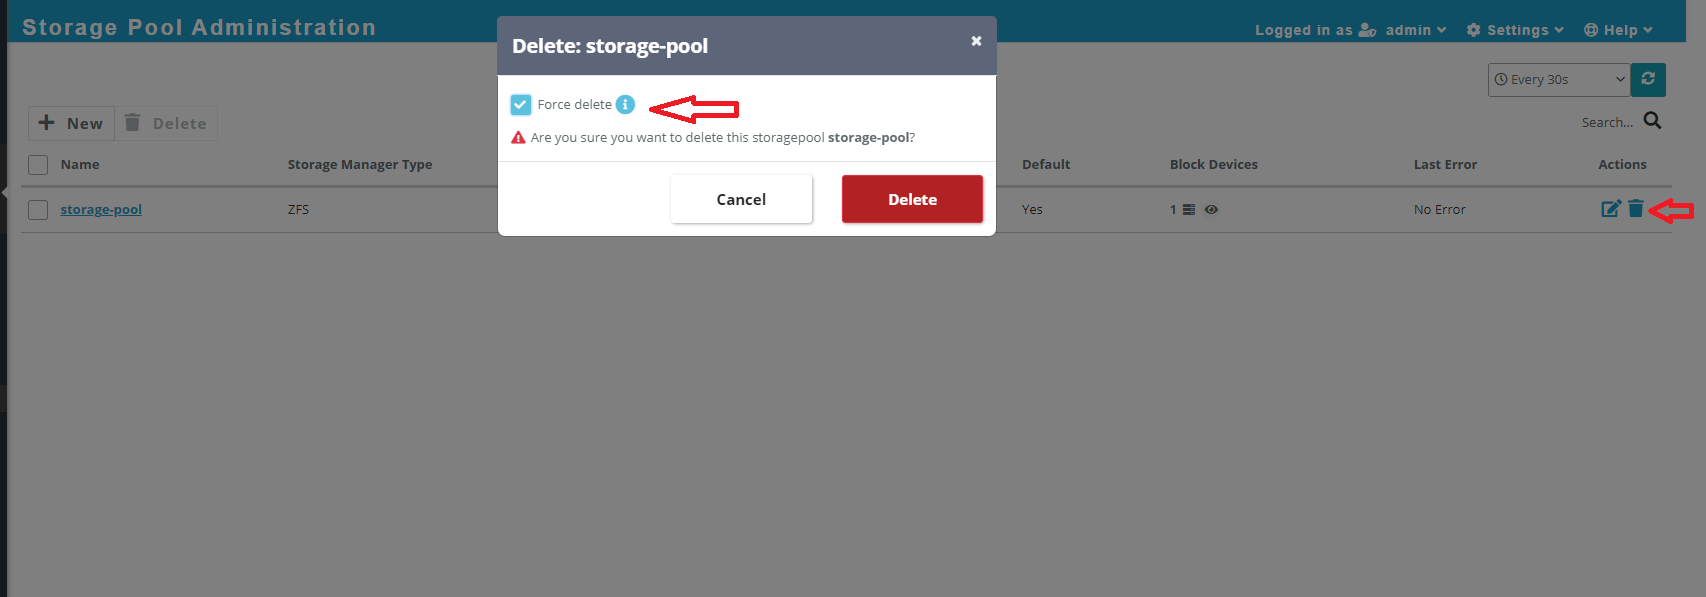
Delete Storage Pool.
1. If you want to delete your created local storage pool, then you need to click on delete icon on the storage pool administration page. Please see below screenshot.
2. As displayed in the below screenshot. there is an option to Force Delete. You can select this option to delete the storage pool, which will forcefully delete the pool along with all captured image groups and backups.