
Overview
IBM Kubernetes Service (IKS) supports two cluster types: IKS Classic and IKS VPC. SWIFT can discover both types of clusters to the dashboard for migration, backup, disaster recovery.
This KB explains how to discover IKS VPC and IKS Classic clusters in the SWIFT dashboard.
Pre-requisite:
1. Ensure that the required IBM Cloud permissions to access the IKS cluster are available. For the required IBM Cloud permissions, refer to the IBM Cloud Prerequisites.
2. To discover the IKS cluster, you must have a cluster created in the IBM cloud and know the region where the cluster is deployed.
Topics Covered
Discover IBM Classic cluster
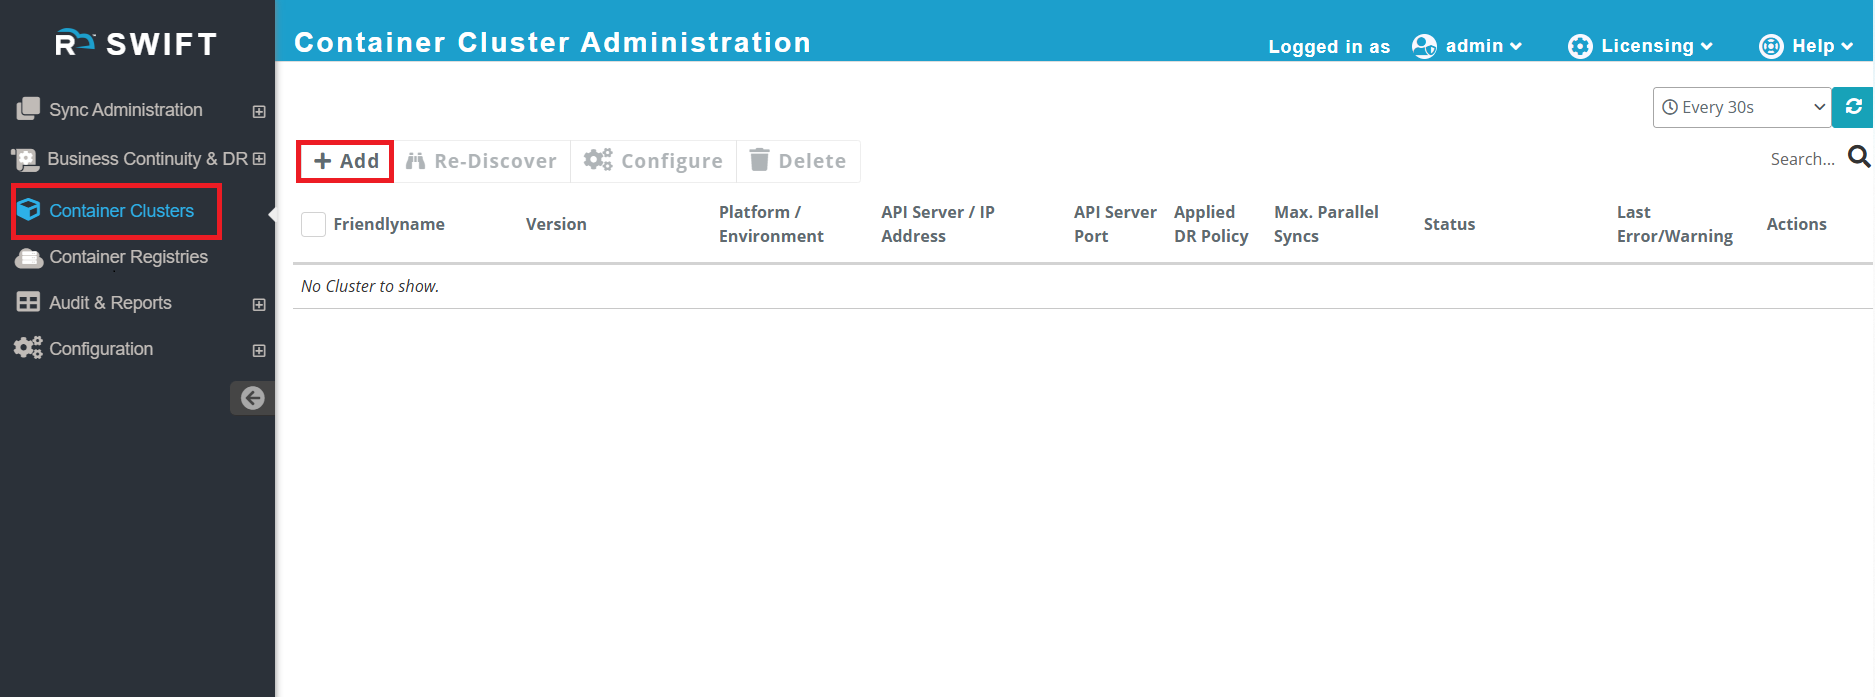
1. Login to the ‘SWIFT’ dashboard and navigate to the ‘Container Cluster’ menu and click on ‘Add’ button. You can check below screenshot for your reference.
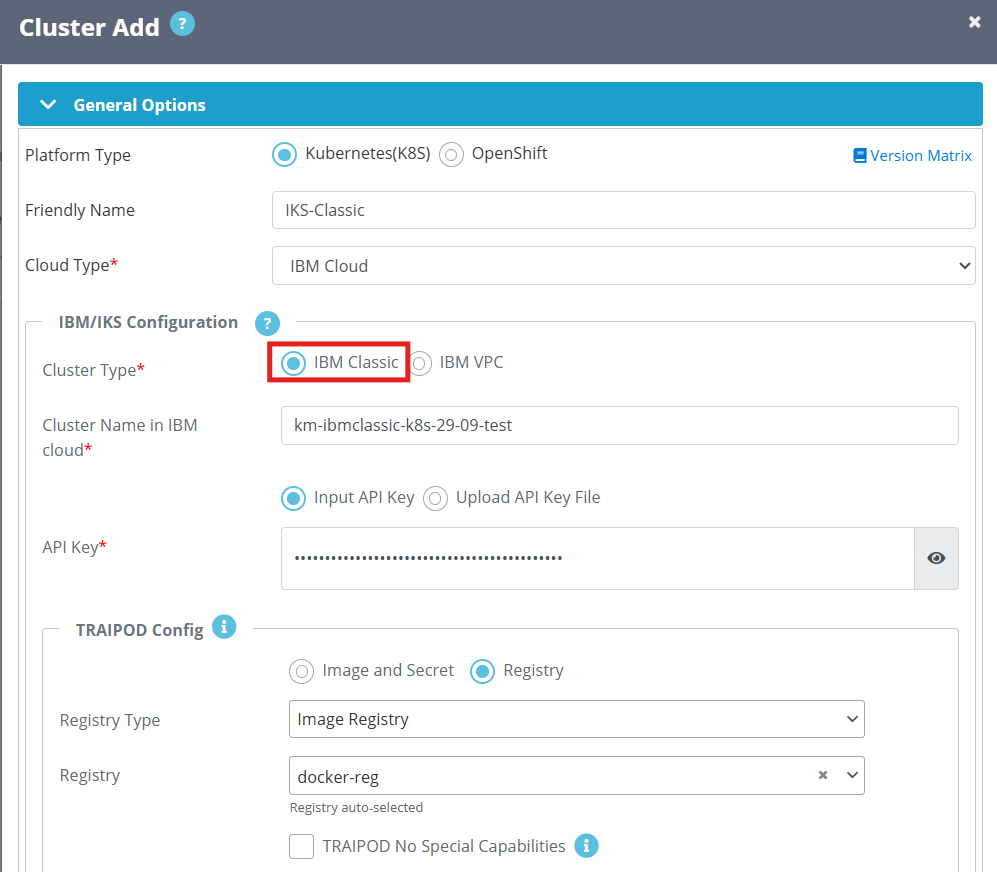
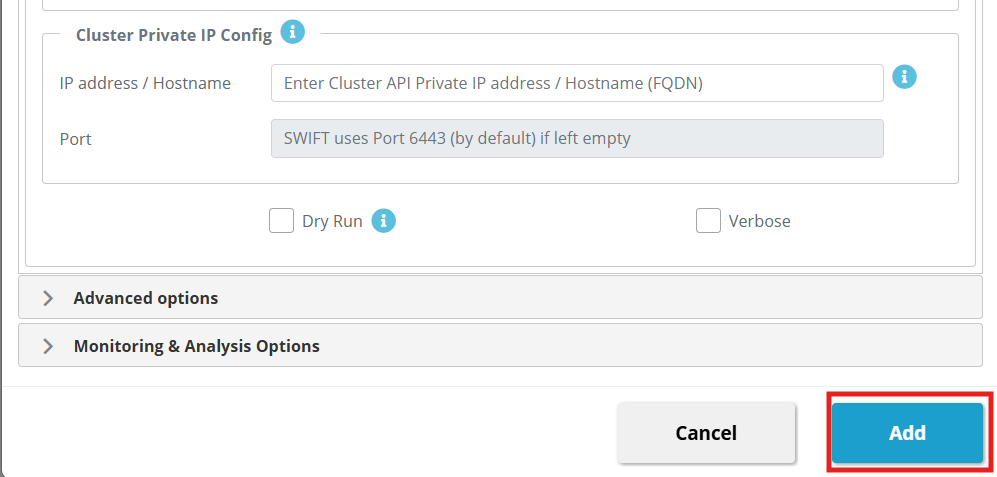
2. Once you click on the ‘Add’ button, a Cluster Add modal/dialog will be displayed. You need to provide the cluster details to be discovered. You can refer to the screenshot below for reference.
| Field Name | Field Description |
| Platform type | Select the platform where your cluster is running |
Friendly name | You need to enter a friendly name according to your cluster or project. |
Cloud Type | Choose the ‘cloud type’ from the dropdown, in this case it is IBM cloud. |
| Cluster Type | Select IBM Classic |
Cluster Name in IBM cloud | Enter the IKS cluster name that you created in IBM cloud. |
| API Key | Provide API key or upload the file of it. |
Private key File | Click on the button to browse your local system and select the private key file (e.g., gcp-key.json). Know More |
| TRAIPOD Config | This is an optional input. They can be configured for each sync, and the values input for the sync will override the defaults set for the cluster. For more info you can look TRAIPOD KB article. To more know about Traipod Config section, Please follow below KB Article. |
| Cluster private IP config | Normally, the IP address or hostname mentioned in the kubeconfig file is used to discover the cluster. However, if you want to set up a private IP or hostname to access the cluster, and the public IP mentioned in the kubeconfig is not used, this setting can be used to overwrite the default kubeconfig IP with the private IP and port. |
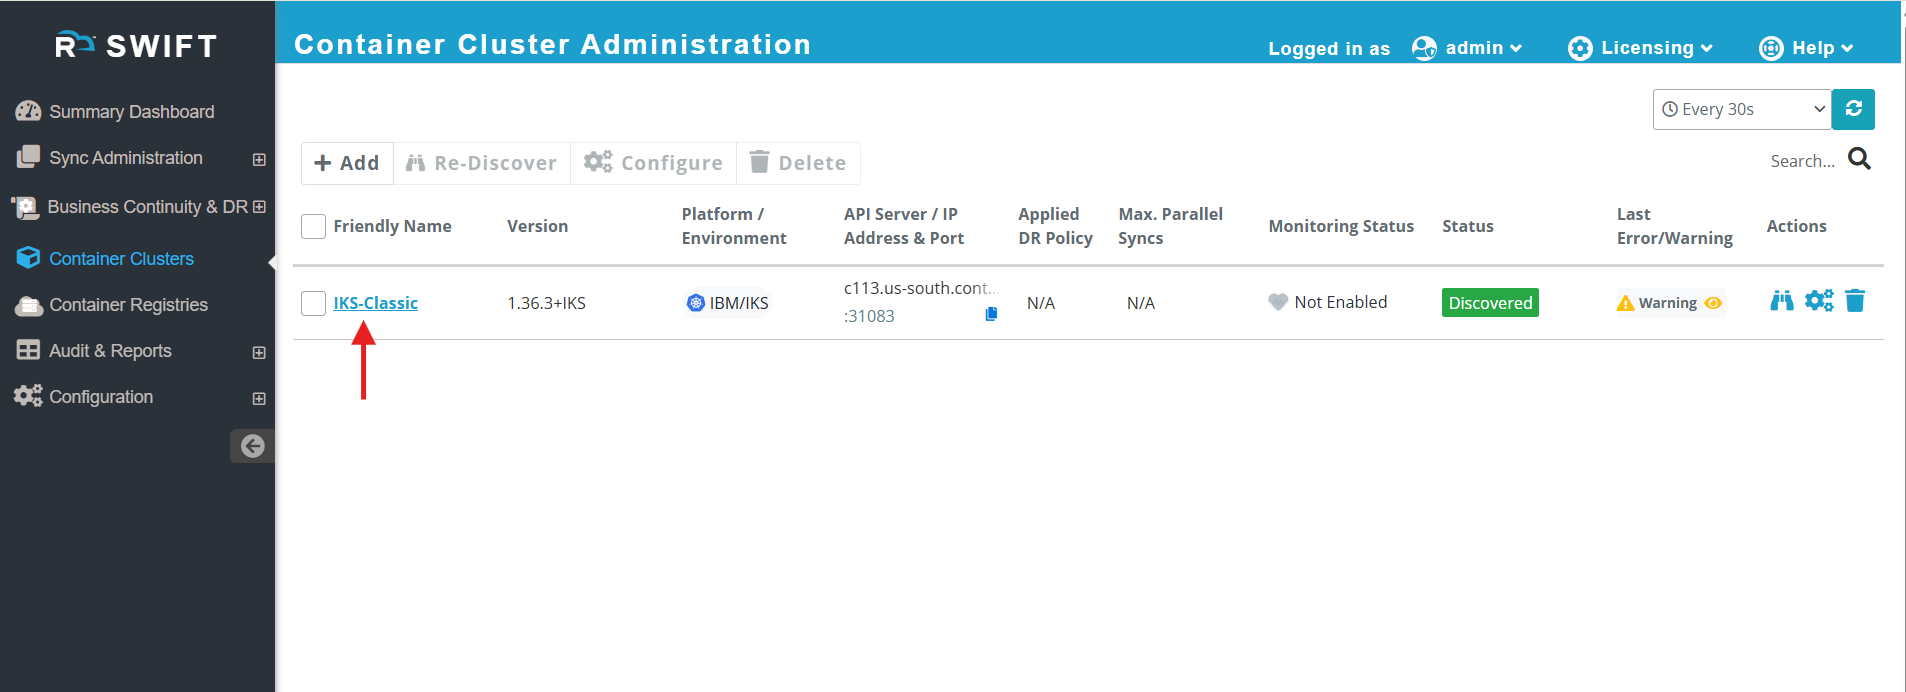
3. Click the Add button. SWIFT will verify the credentials and automatically discovered the cluster. Please see below screenshot.
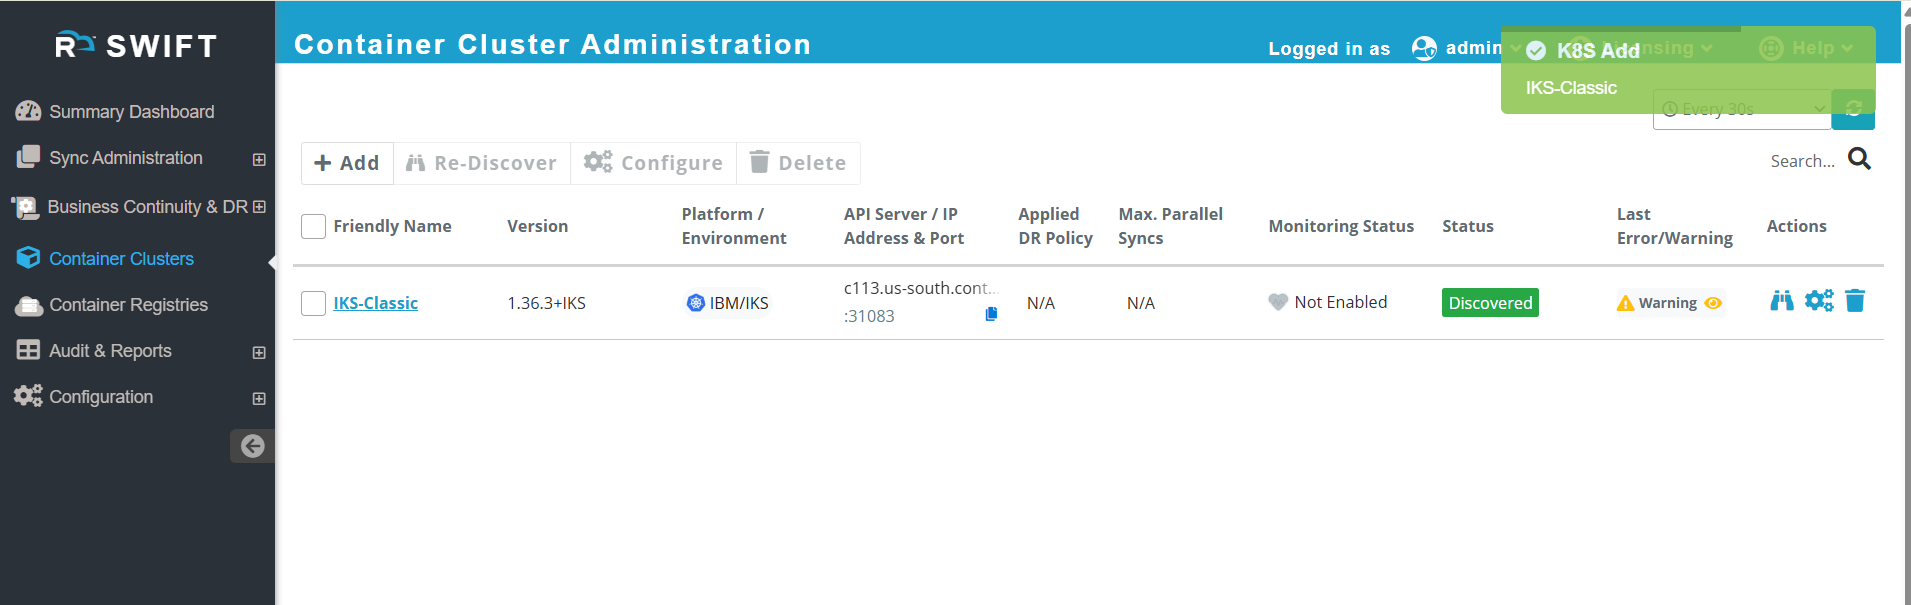
4. Once the cluster is discovered, you can view all information about the cluster and its metadata. Simply click on the cluster to expand it and view the details. Refer to the screenshot below for guidance.
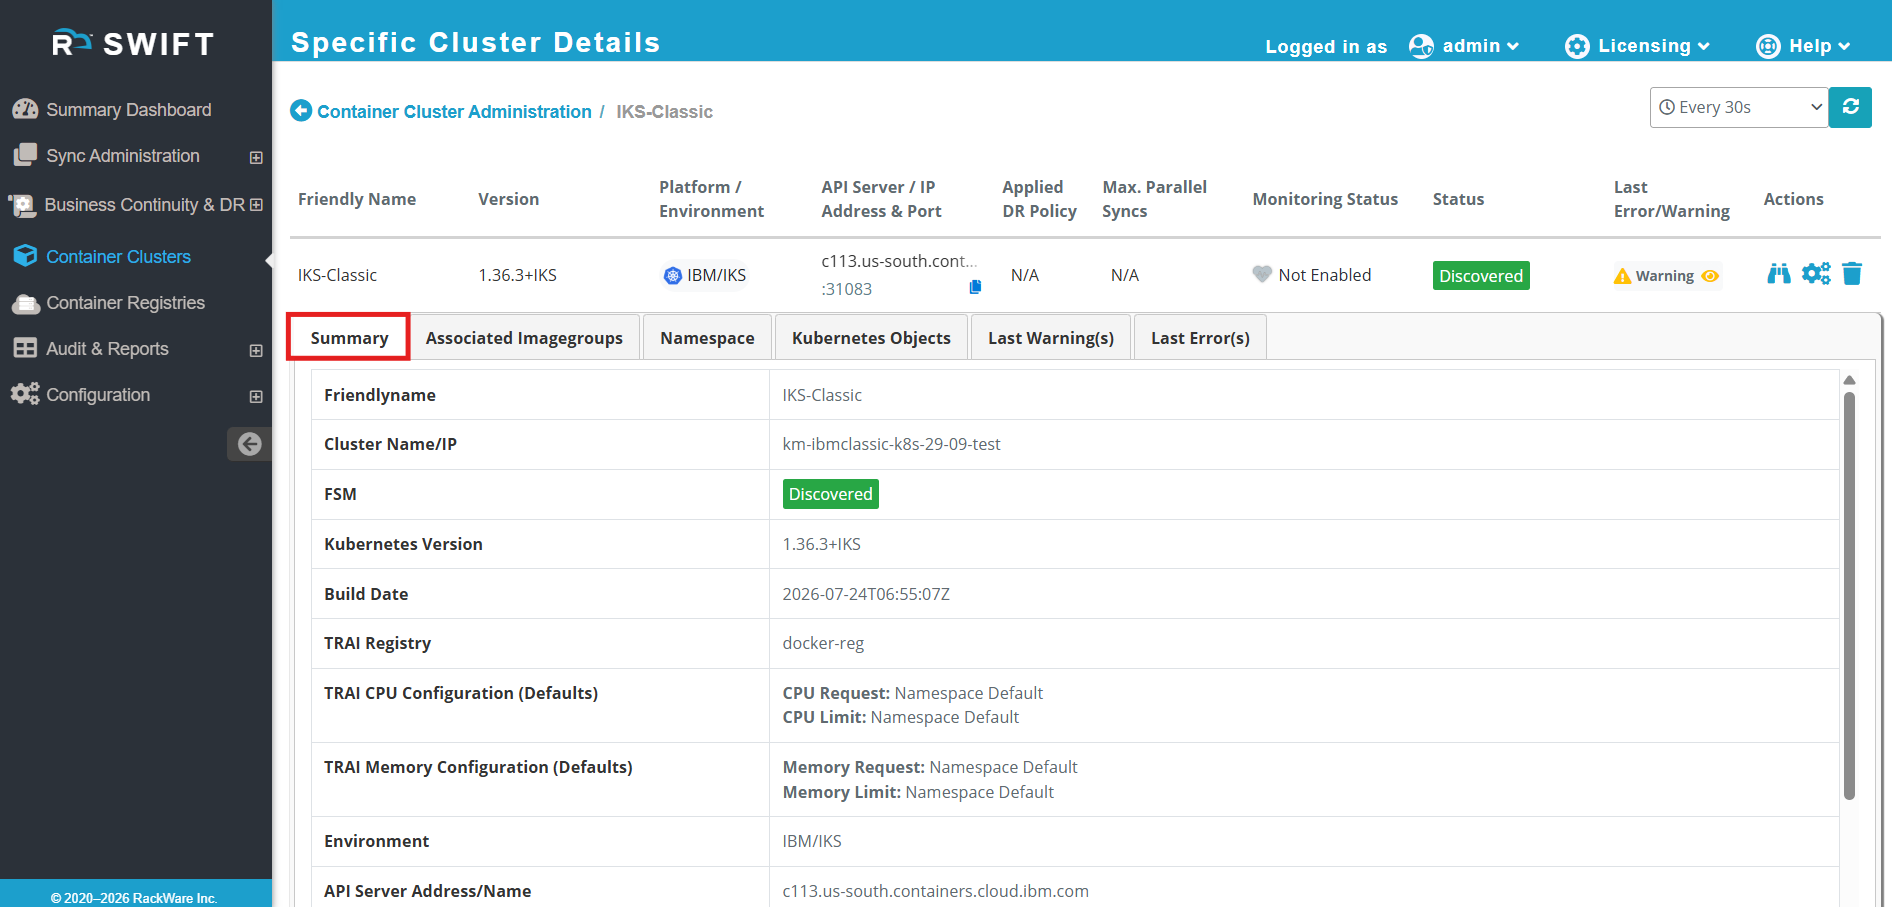
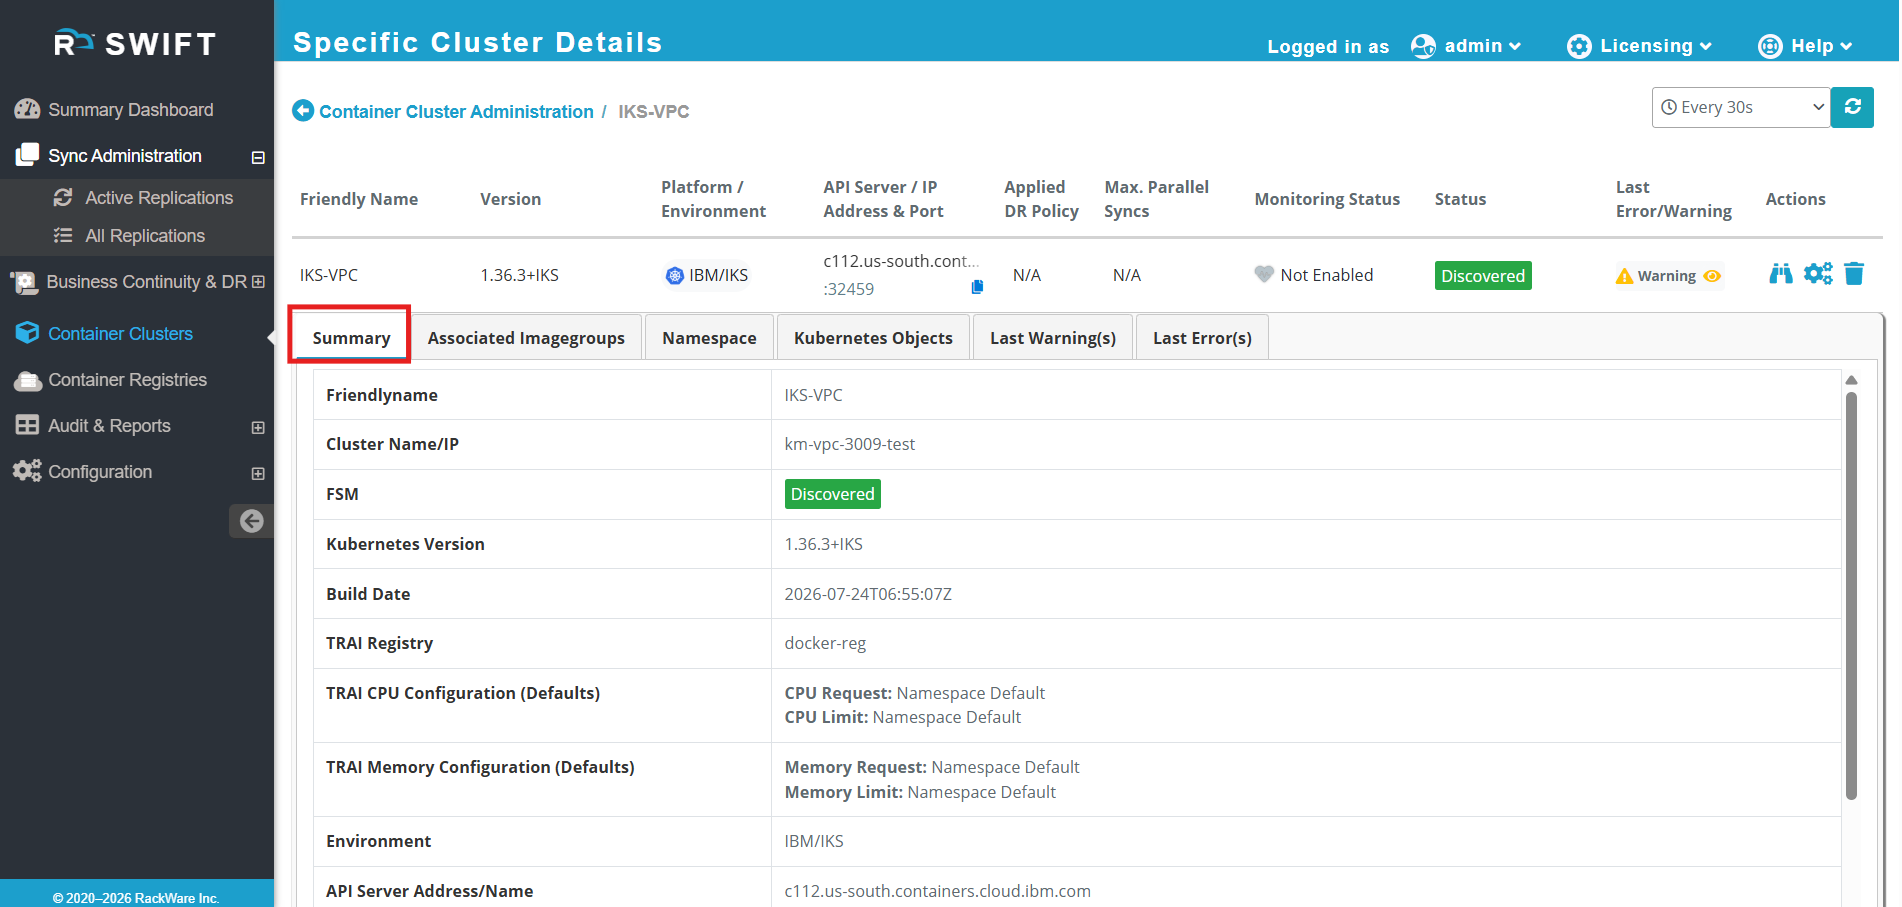
- When you go to the Summary tab, you will find information about the cluster, such as its creation date, IBM cluster name, API server port, Kubernetes version, and more.
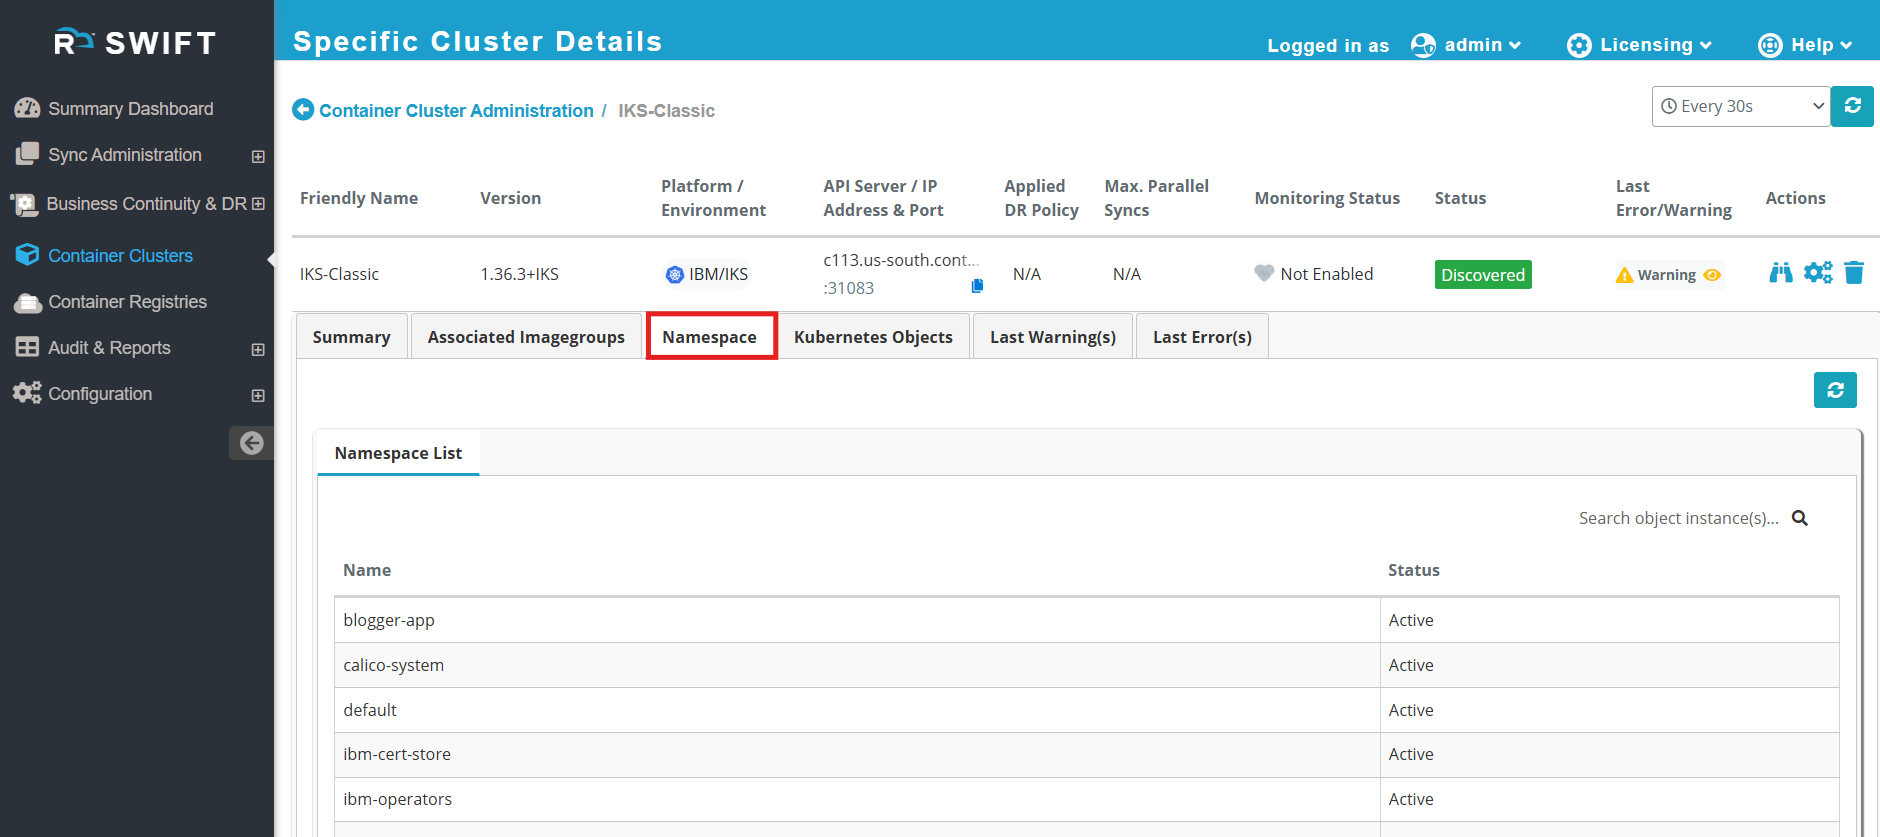
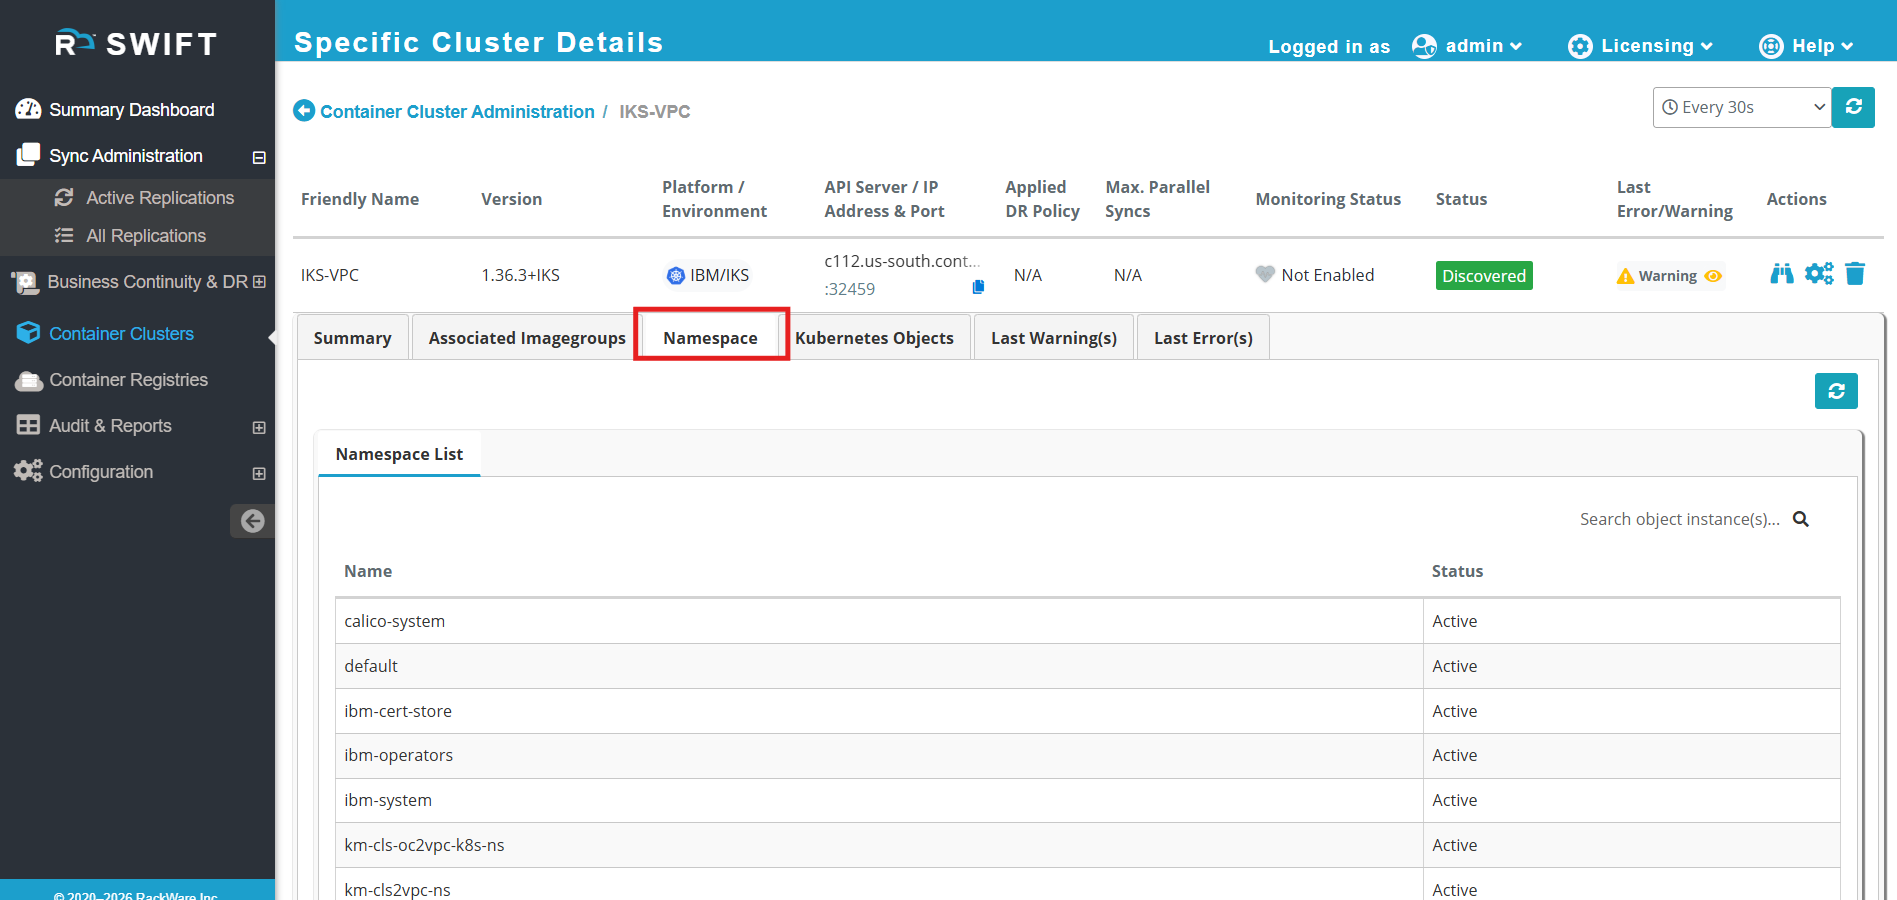
- When you go to the Namespace tab, you will see all the namespaces created in the cluster, including the default namespaces provided by IBM. Please see below screenshot.
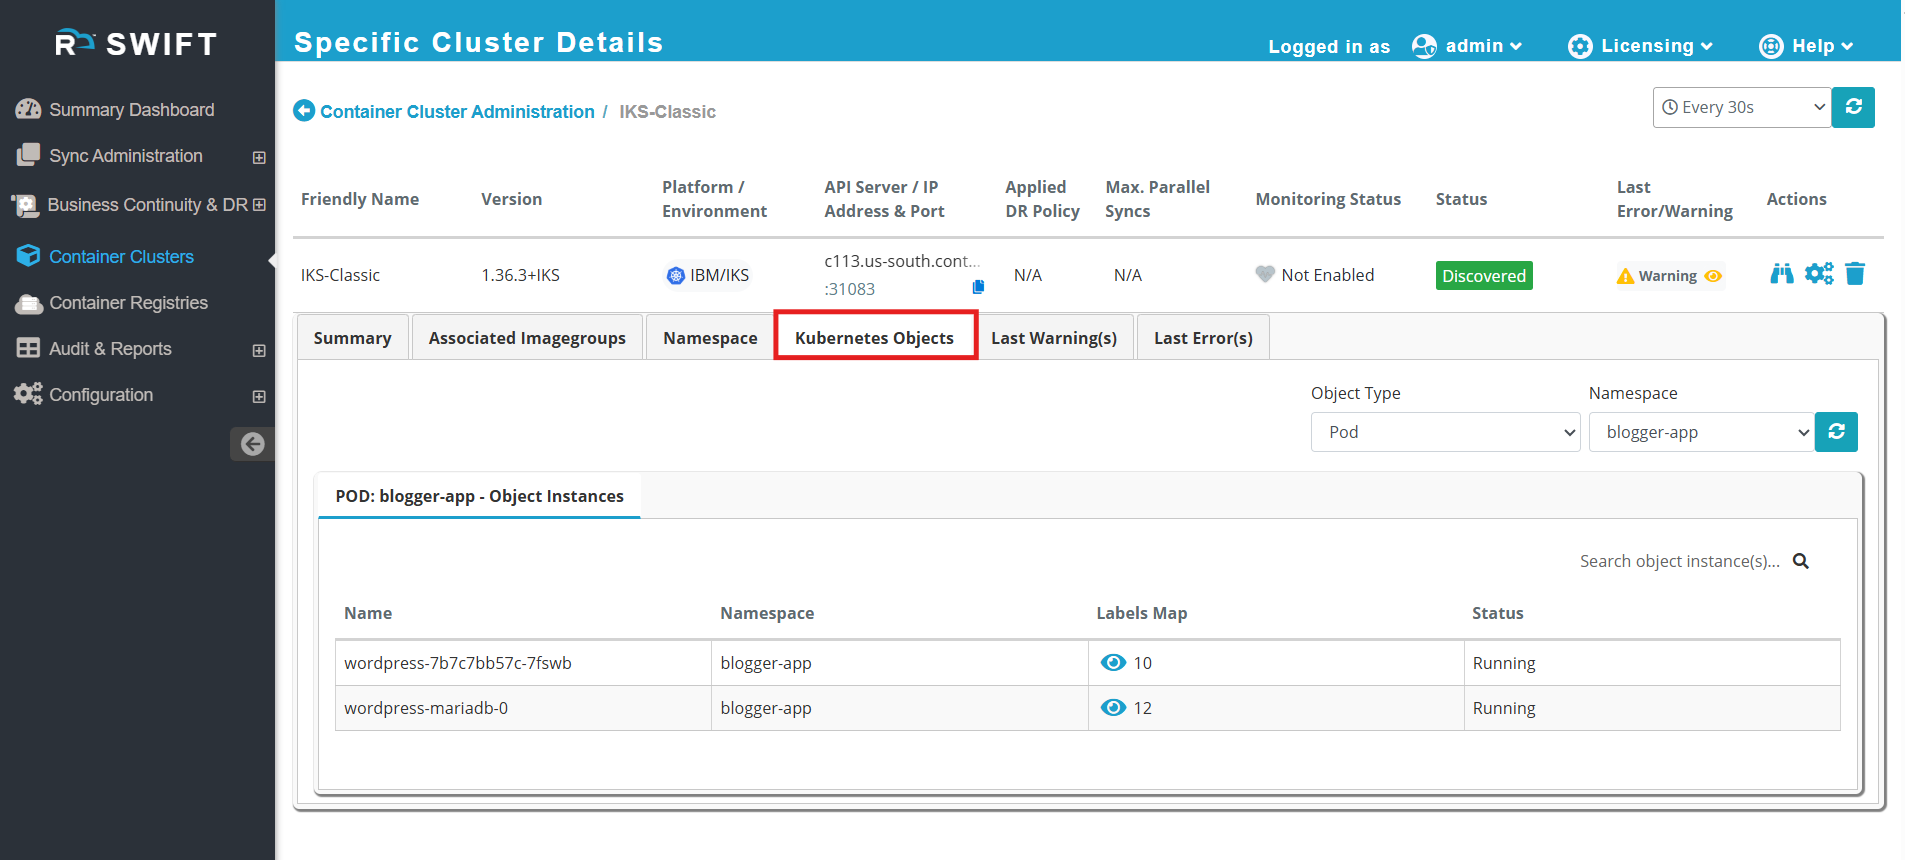
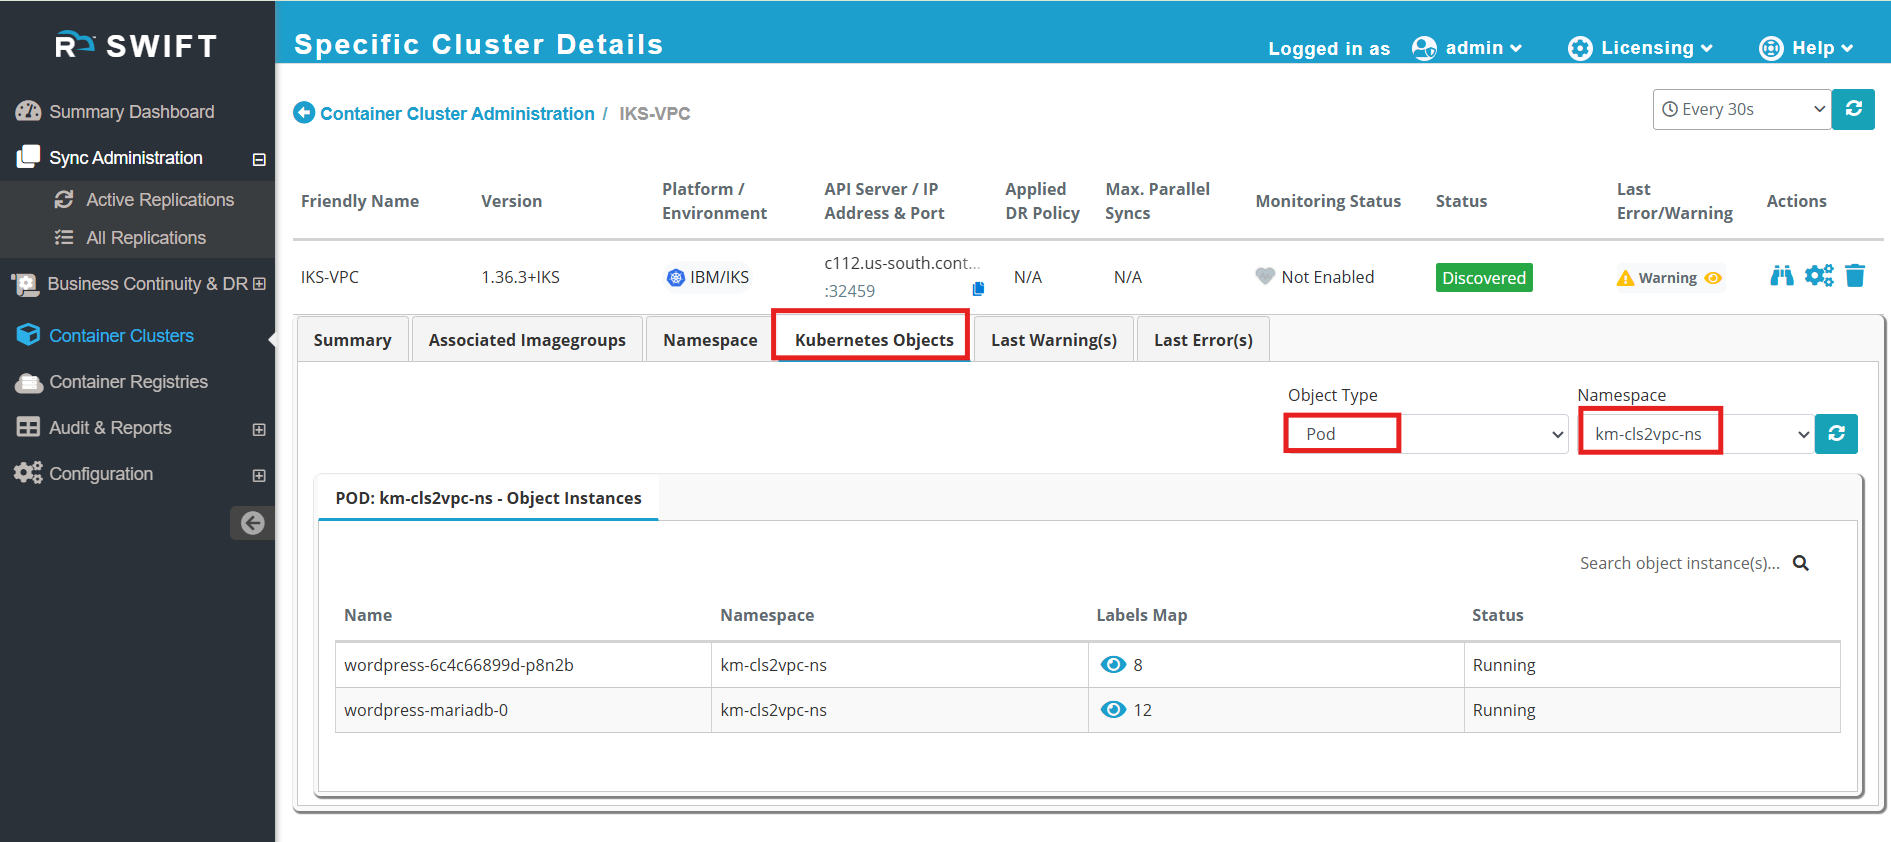
- When you go to the Kubernetes Objects tab, you can view the objects running in your namespace. Simply select the object type from the Object Type tab and choose the namespace from the dropdown. This will display the objects running in that namespace on the cluster. In the screenshot below, you can see that two pods are running in the blogger-app namespace.
Discover IBM VPC cluster
1. Login to the ‘SWIFT’ dashboard and navigate to the ‘Container Cluster’ menu and click on ‘Add’ button. You can check below screenshot for your reference.
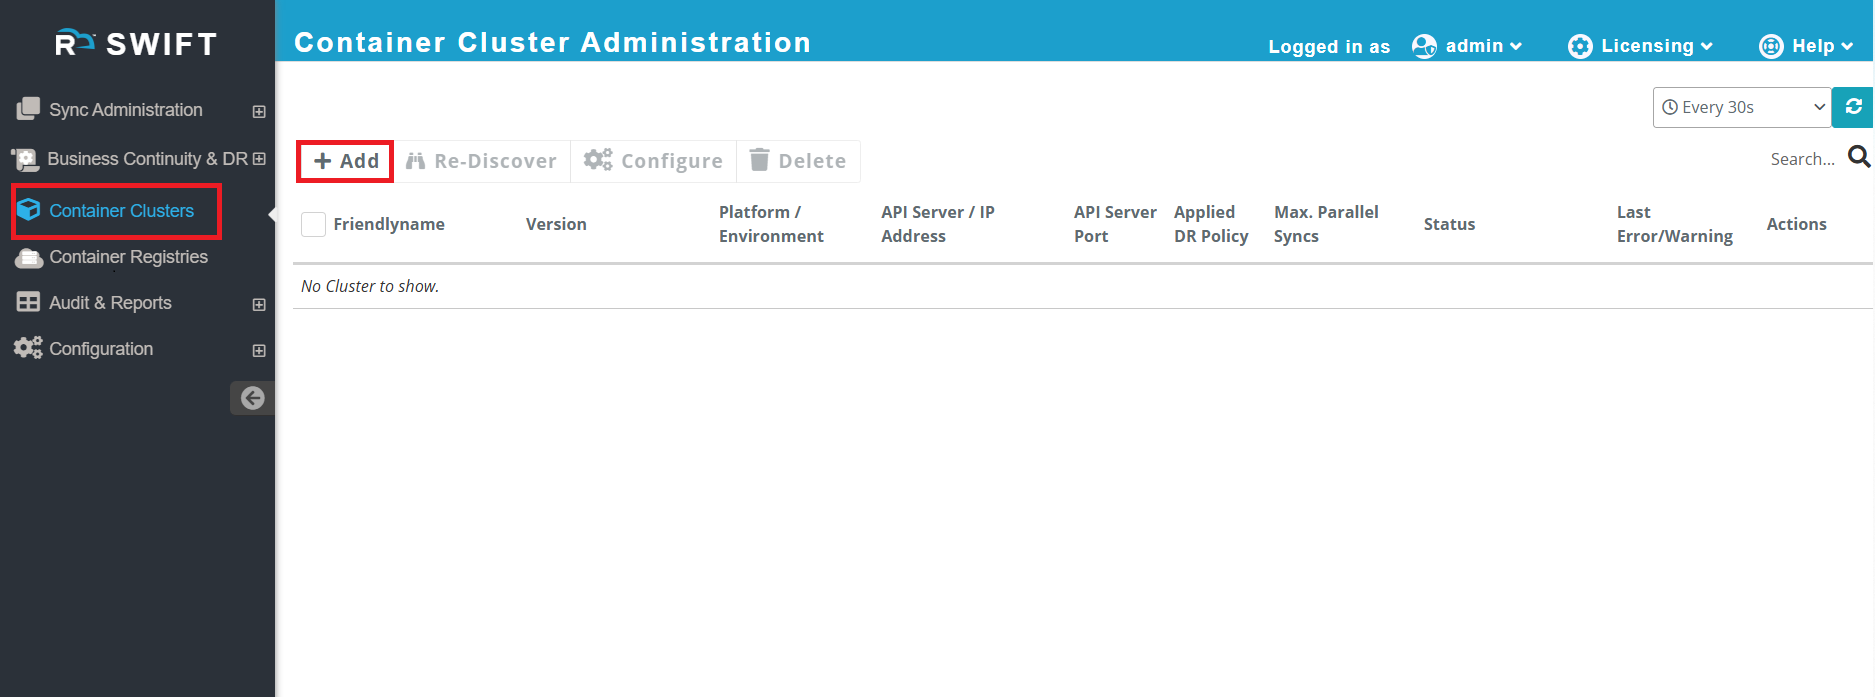
2. Once you click on the ‘Add’ button, a Cluster Add modal/dialog will be displayed. You need to provide the cluster details to be discovered. You can refer to the screenshot below for reference.
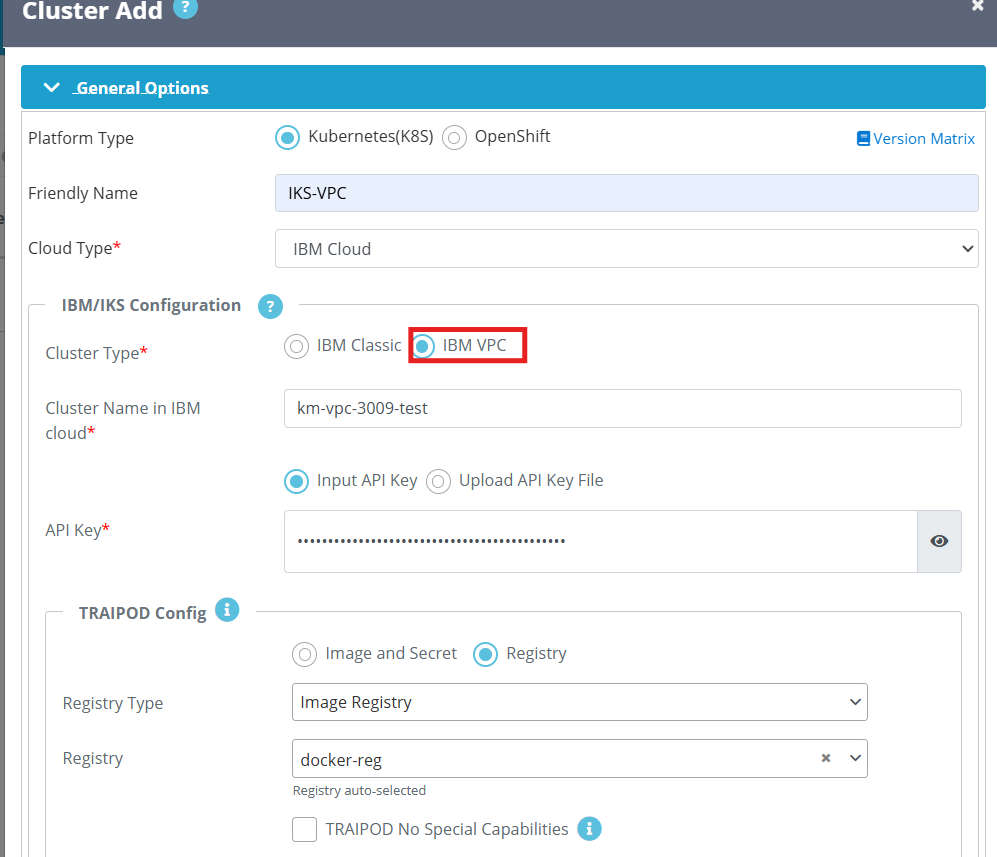
| Field Name | Field Description |
| Platform type | Select the platform where your cluster is running |
Friendly name | You need to enter a friendly name according to your cluster or project. |
Cloud Type | Choose the ‘cloud type’ from the dropdown, in this case it is IBM cloud. |
| Cluster Type | Select IBM VPC |
Cluster Name in IBM cloud | Enter the IKS cluster name that you created in IBM cloud. |
| API Key | Provide API key or upload the file of it. |
Private key File | Click on the button to browse your local system and select the private key file (e.g., gcp-key.json). Know More |
| TRAIPOD Config | This is an optional input. They can be configured for each sync, and the values input for the sync will override the defaults set for the cluster. For more info you can look TRAIPOD KB article. To more know about Traipod Config section, Please follow below KB Article. |
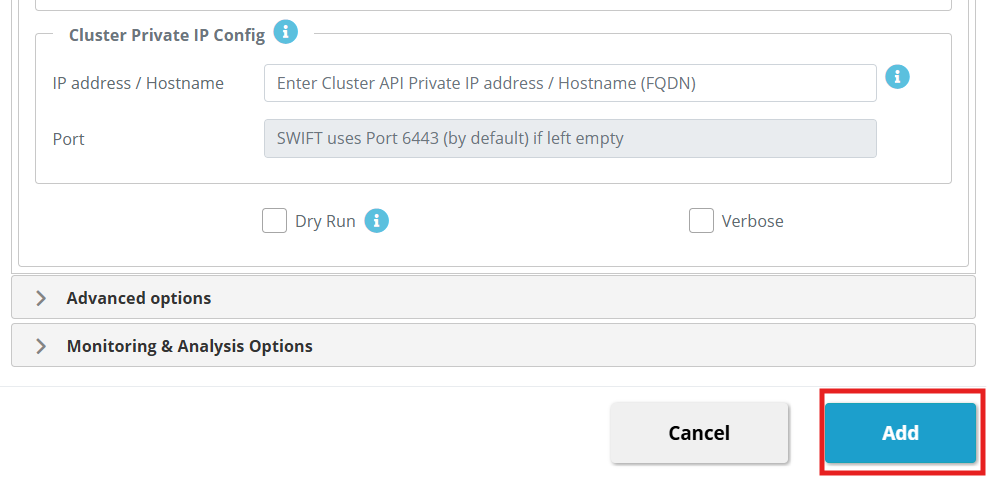
| Cluster private IP config | Normally, the IP address or hostname mentioned in the kubeconfig file is used to discover the cluster. However, if you want to set up a private IP or hostname to access the cluster, and the public IP mentioned in the kubeconfig is not used, this setting can be used to overwrite the default kubeconfig IP with the private IP and port. |
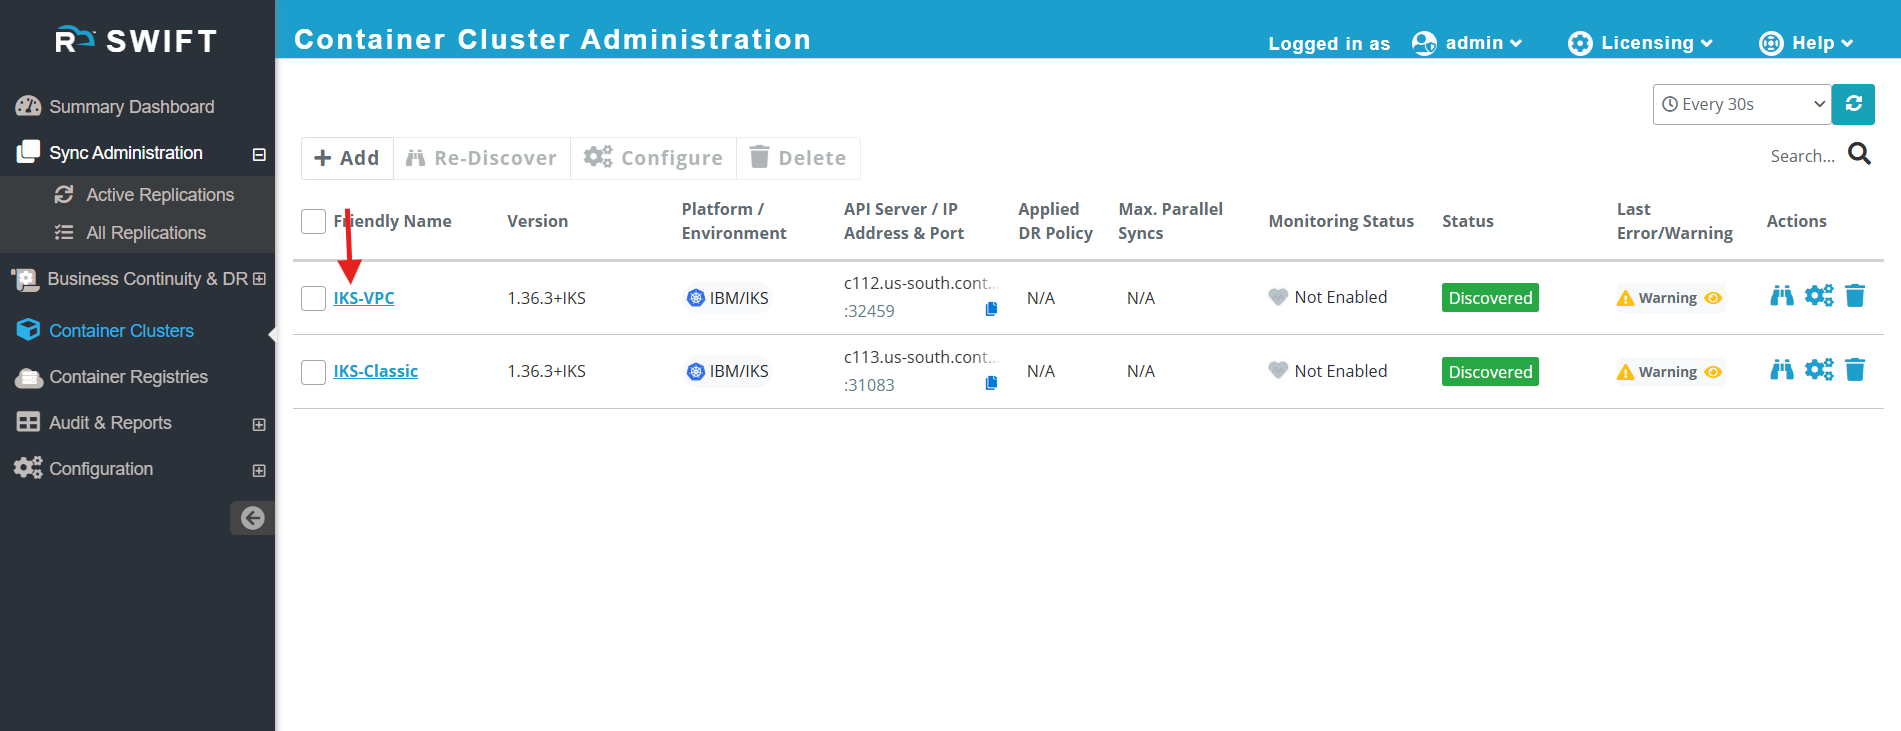
3. Click the Add button. SWIFT will verify the credentials and automatically discovered the IBM VPC cluster. Please see below screenshot.
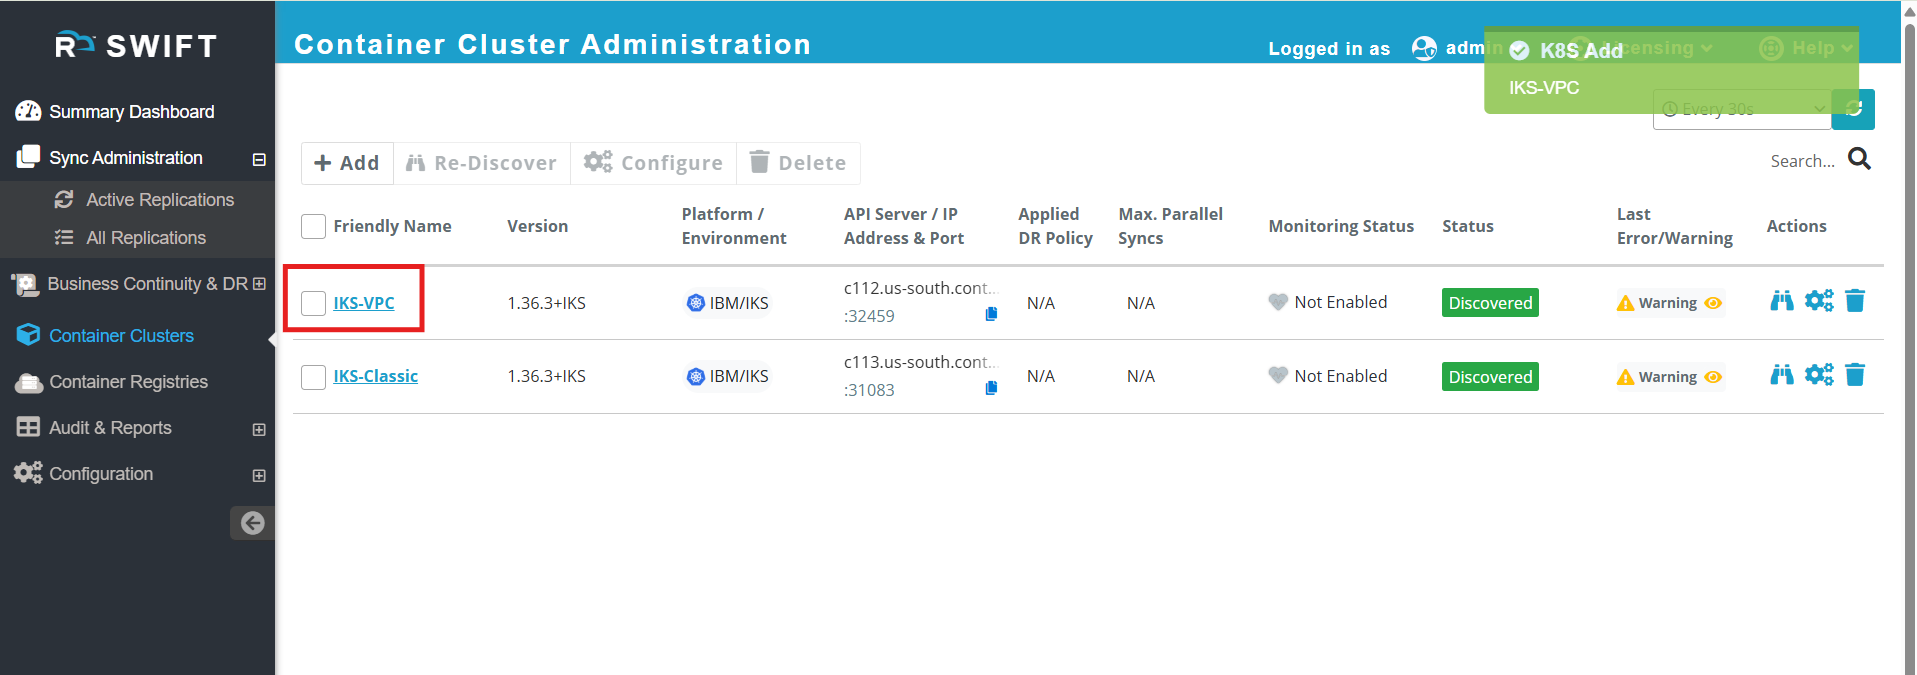
4. Once the cluster is discovered, you can view all information about the cluster and its metadata. Simply click on the cluster to expand it and view the details. Refer to the screenshot below for guidance.
- When you go to the Summary tab, you will find information about the cluster, such as its creation date, IBM cluster name, API server port, Kubernetes version, and more.
- When you go to the Namespace tab, you will see all the namespaces created in the cluster, including the default namespaces provided by IBM. Please see below screenshot.
- When you go to the Kubernetes Objects tab, you can view the objects running in your namespace. Simply select the object type from the Object Type tab and choose the namespace from the dropdown. This will display the objects running in that namespace on the cluster. In the screenshot below, you can see that two pods are running in the km-cls2vpc-ns namespace.
5. Once the both cluster is discovered, you will have access to additional operations. You can perform the following actions on the selected cluster.
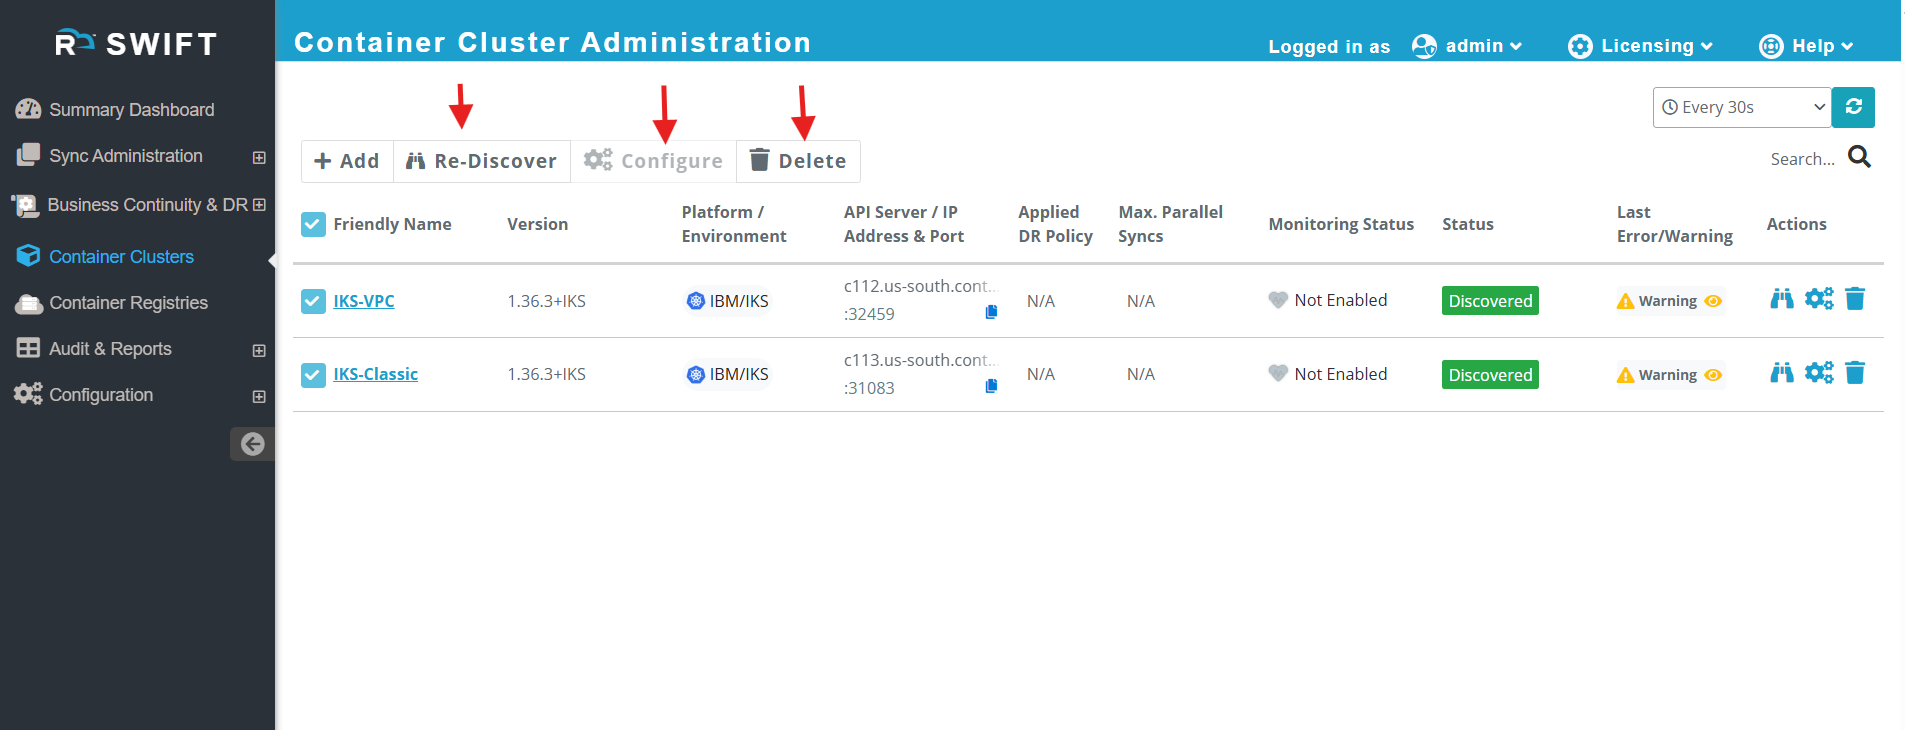
- Re-Discover : This option allows you to re-discover the cluster. If you have added new namespaces or applications to the cloud cluster and want them to be reflected in the SWIFT portal, you can re-discover the cluster.
- Configure : Use this option if you want to modify the cluster configuration. Please check KB Article on 'Configure the cluster'
- Delete : Use this option to delete the cluster. However, ensure that no DR Policy is attached to the cluster; otherwise, the cluster cannot be deleted and the Delete option will be disabled. It will delete from SWIFT dashboard only not from cloud.
What next:
-Now that the clusters are discovered, you may want to set up a Migration or Disaster Recovery (DR) job. Then follow below KB links.
Related KB's