During DR Policy creation, you can apply several customizations that take effect when the DR Policy is applied with sync.
Points Covered
- Advanced options for Passthrough DR Policy
- Advanced options for Stage1 DR Policy
- Advanced options for Stage1+2 DR Policy
Based on the selected sync type, different options will be available under the Advanced Options section.
Advanced options for Passthrough DR Policy
1. For this Passthrough type, you need to fill in the required details under the General Options section of the DR Policy. Please refer to How to Create a DR Policy – General Options for detailed instructions.
2. After following the above KB, go to the Advanced Options tab by clicking on it.

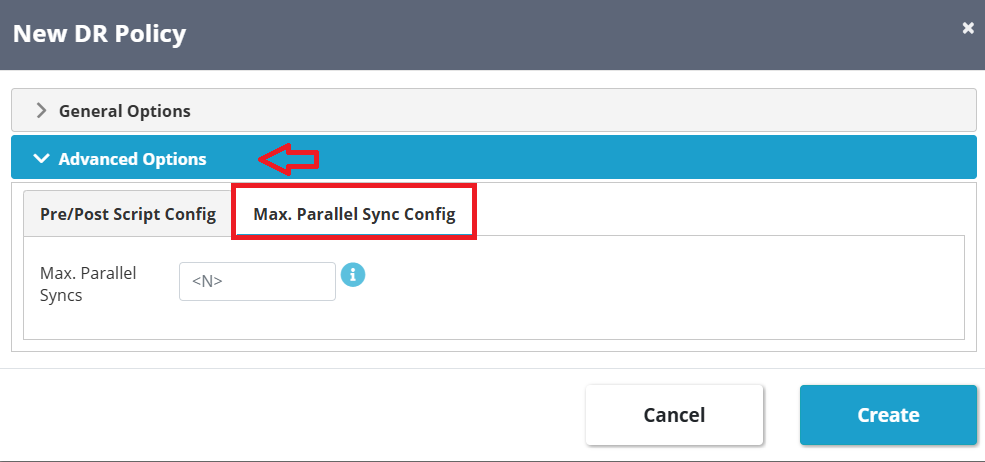
3. When you click on the Advanced Options tab, you will see the following options available to customize the DR Policy creation.
-For Pre/Post Script Configuration, you can refer to the Pre/Post Script section in the Advanced Options Sync KB.

-For Max Parallel Sync Configuration, refer to the Max. Parallel Sync Config KB.
this is for DR, we can mention.
4.Once you click on the Create button, the DR Policy will be created.
For example, if you have configured the Max Parallel Sync value as 2, it will be displayed accordingly after the DR Policy is created.

Advanced options for Stage1 DR Policy
1.For the Stage 1 sync type, there will be two additional tabs — one for Advanced Options and another for Backup Schedule Options.
2. When you go to the Advanced Options tab, you will only see the Max. Parallel Sync Config option. For detailed instructions, please refer to the How to Set Up Max Parallel Sync Config KB.

3. When you go to the Backup Schedule Options tab, you will see two options: Local Backup and Remote Backup.

- Local Backup : You can configure short-term backups by specifying the number of days or weeks for which the backups should be retained on the SWIFT server. You can also define the number of backup copies you want to keep. The local backups are stored in the ZFS storage pool created on the SWIFT server.
- Remote Backup: This feature is designed and implemented to provide a high-availability (HA) use case for SWIFT during a Disaster Recovery (DR) scenario. In case the SWIFT server is lost, you can spin up a new instance and restore the data using the remote backup stored in the cloud.
4.Once you click on the Create button, the Backup Schedule will be displayed as we have given backup interval. .

Advanced options for Stage1+2 DR Policy
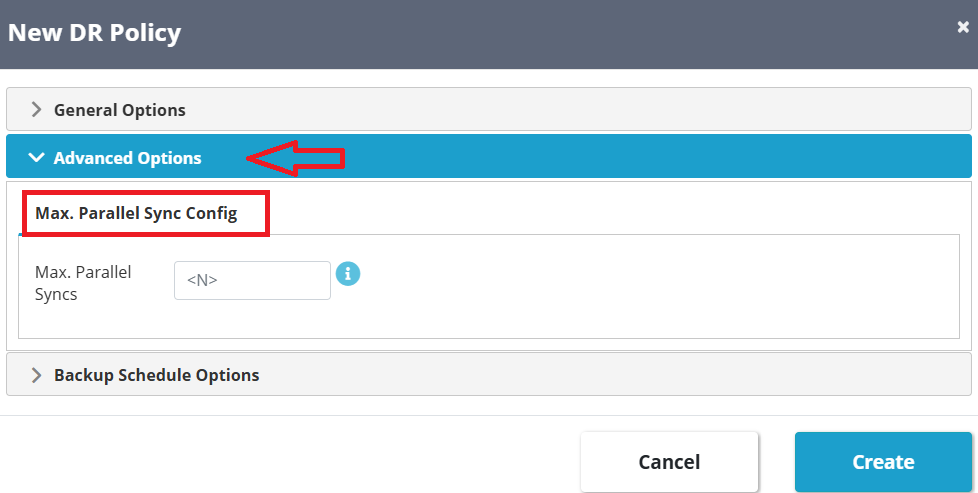
1.For the Stage1+2 sync type, there will be two additional tabs — one for Advanced Options and another for Backup Schedule Options.. 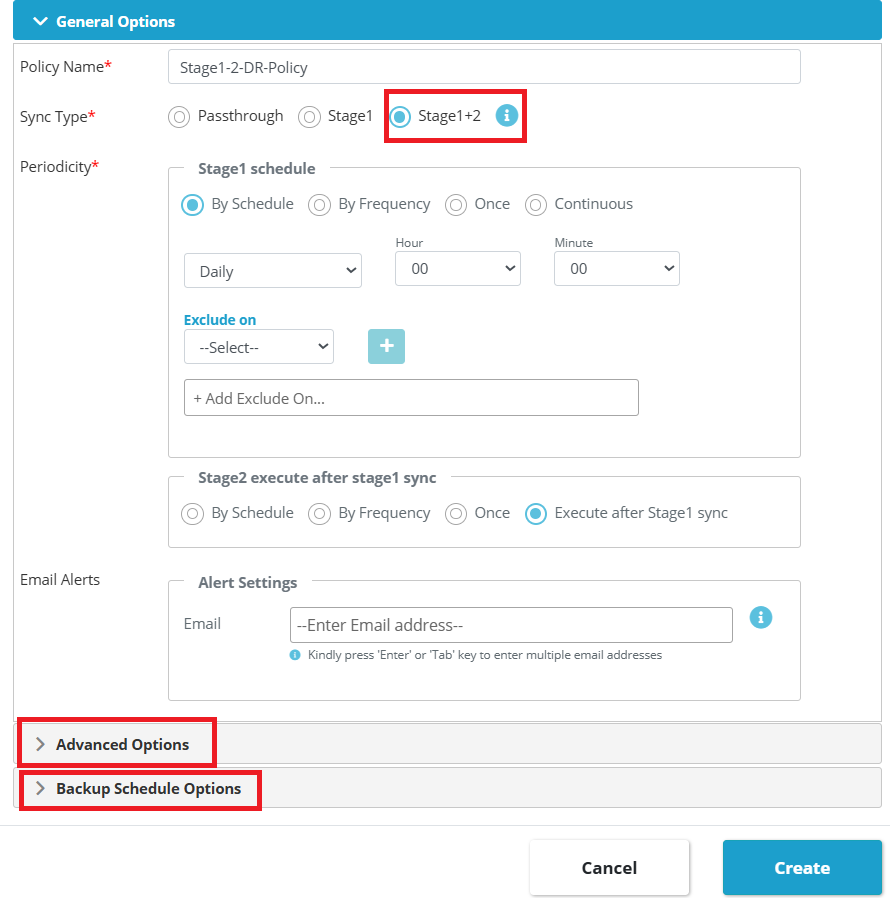
2. When you go to the Advanced Options tab, you will only see the Max. Parallel Sync Config option. For detailed instructions, please refer to the How to Set Up Max Parallel Sync Config KB.
3. When you go to the Backup Schedule Options tab, you will see two options: Local Backup and Remote Backup.

- Local Backup : You can configure short-term backups by specifying the number of days or weeks for which the backups should be retained on the SWIFT server. You can also define the number of backup copies you want to keep. The local backups are stored in the ZFS storage pool created on the SWIFT server.
- Remote Backup: This feature is designed and implemented to provide a high-availability (HA) use case for SWIFT during a Disaster Recovery (DR) scenario. In case the SWIFT server is lost, you can spin up a new instance and restore the data using the remote backup stored in the cloud.
4.Once you click on the Create button, the Backup Schedule will be displayed as we have given backup interval. You can refer to the screenshot below for reference.
