This KB explains how to apply a Disaster Recovery (DR) Policy for Stage 1 with dynamic cluster provisioning.
In this process, a target cluster is automatically created during DR policy failover instead of using a pre-existing cluster. The system provisions the required resources dynamically, applies the DR configuration, and initiates replication for the selected applications or namespaces.
This approach helps in saving costs, as there is no need to keep the DR cluster running at all times. The DR cluster is created automatically only when needed, such as during a failover operation, ensuring efficient resource utilization and faster recovery setup.
Pre-requisite:
Stage1 DR Policy must be created
How to choose DR clusters under DR cluster config
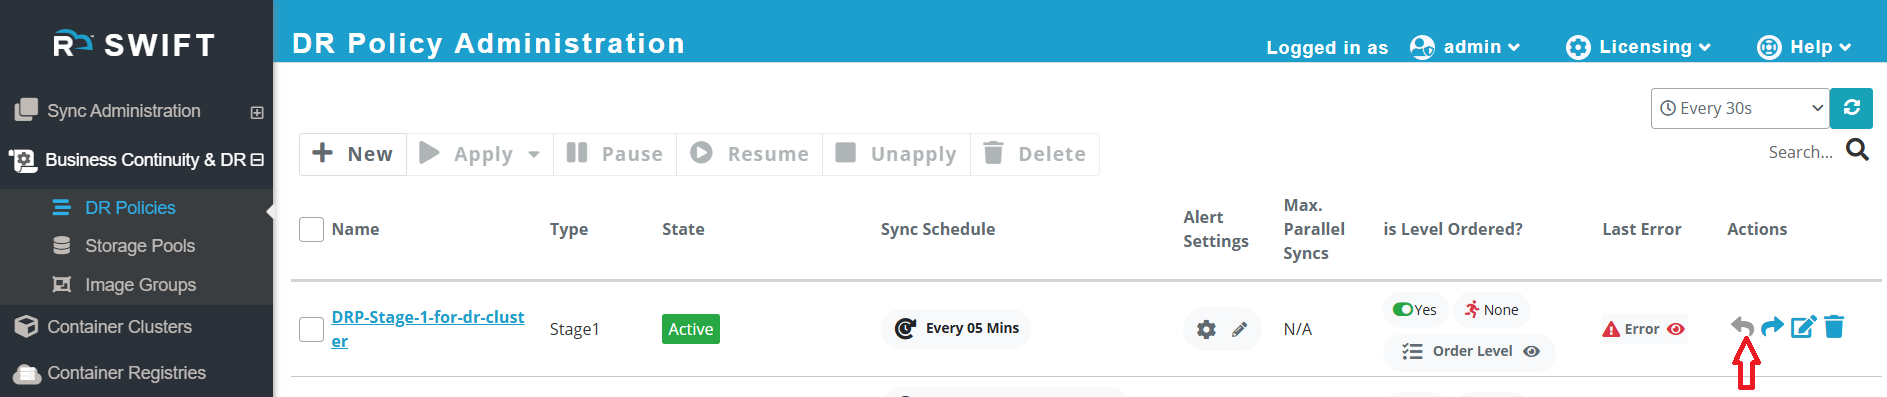
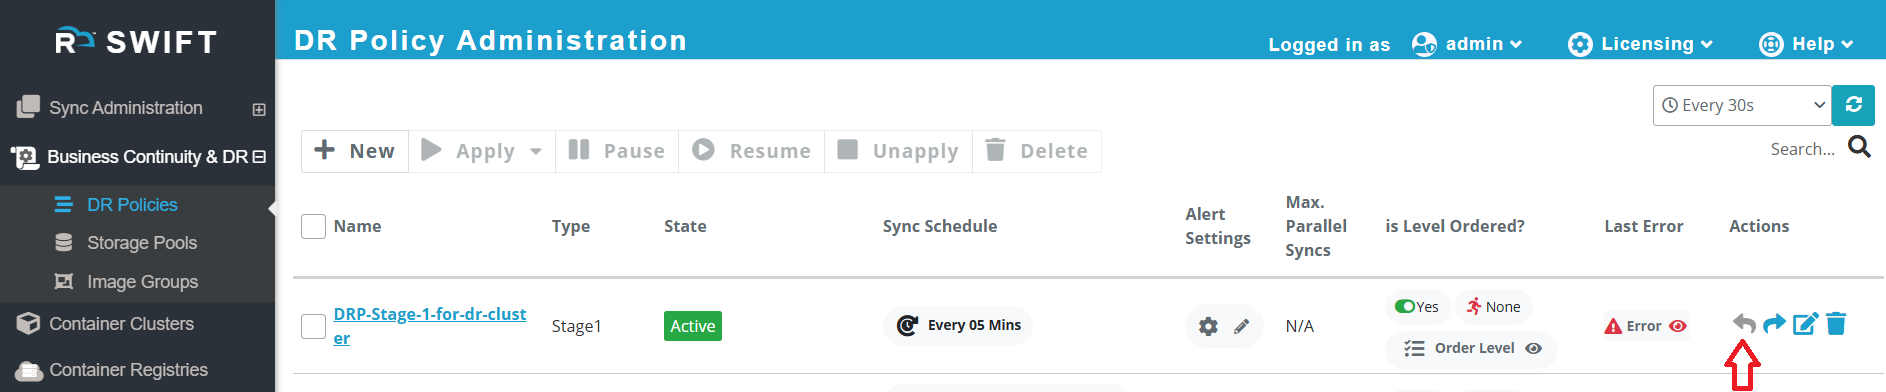
1. Go to DR Policies under Business DR and Continuity > click on the created Stage1 DR Policy > then click on the Apply button > choose Application Replication with DR Cluster.

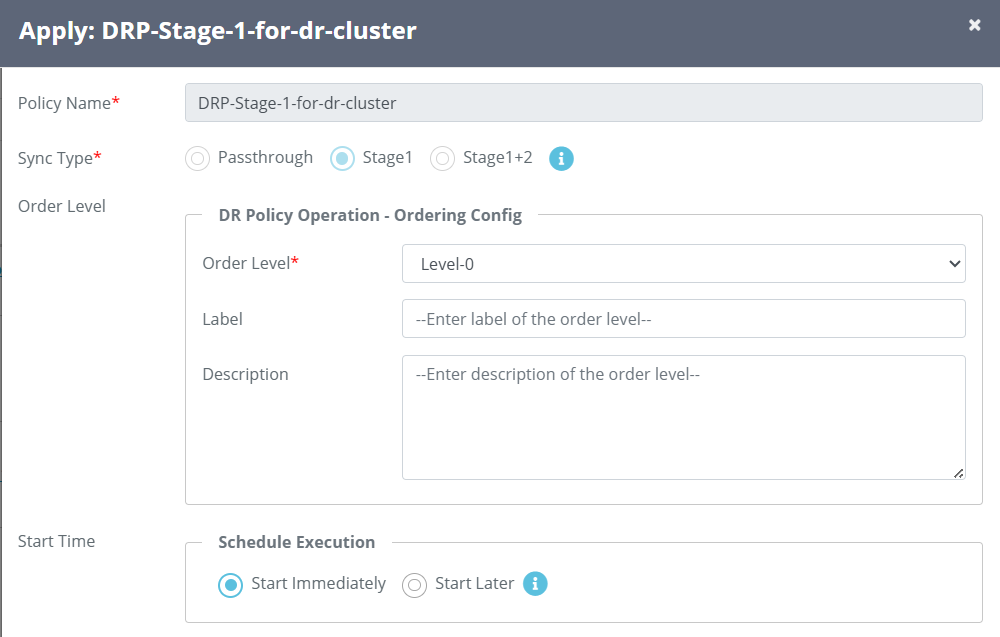
2. Then a new window will appear where you need to select the cloud on which you want to create the DR cluster. All supported clouds will be shown in the dropdown list

We support below clouds to create a dynamic DR creation.
Supported Clouds
Now, let’s see how to create a DR cluster in SWIFT.
GCP DR Cluster
1. Click on created stage1 DR Policy > Click on Apply > Select 'Application replication with DR cluster'.

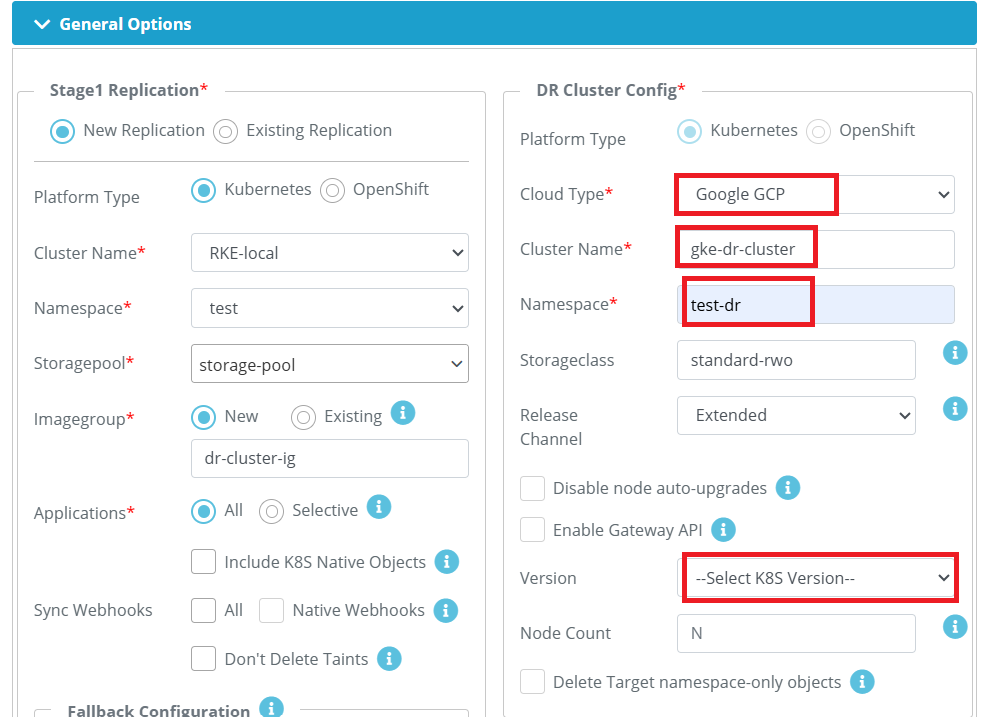
2. After that you will get a below page to select your source cluster and choose your GCP DR cluster config section.
DR Cluster Config fields details
| Fields | Field description |
| Platform type | Select the platform type as per your environment |
| Cloud type | Select any cloud to create a DR cluster here we have selected Google GCP. |
| Cluster Name | Provide any name , it will create a DR cluster with that name. |
| Namespace | Provide any namespace name and it will be created with same name after DR cluster creation. |
| StorageClass (Optional) | This is optional. If specified storageclass doesn't exist in DR cluster, then default storageclass will be used. |
| Release channel (Optional) | Use this option to specify release channel for cluster. |
| Disable node auto upgrade | Use this option to disable automatic version upgrade for worker node. This option is applicable only for cluster configured with No release channel. |
| Enable gateway API (Optional) | Use this option to enable Gateway API support for the cluster. This option is not applicable for cluster configured with extended channel. |
| Version (Optional) | Select any K8S version. |
| Node Count (Optional) | For GKE DR cluster , 1 node count means 3 instances (worker nodes) get created. |
Provide TRAIPOD option as per your environment.


GCP Configuration details.
| Field | Fields description |
| Region | Provide the region where you have to create a DR cluster. |
| Zone | This option is not mandatory, but you can provide any zone from dropdown list if cluster is multizonal. |
| Node Disk size | Provide as per your workload |
| Machine Type | You can select as you want. |
| DR Cluster Tag | Add tag to organize your resources. For more information, you can click on 'i' button on SWIFT dashboard. |
| Private Key file | You can upload the private key file for GKE service account. |
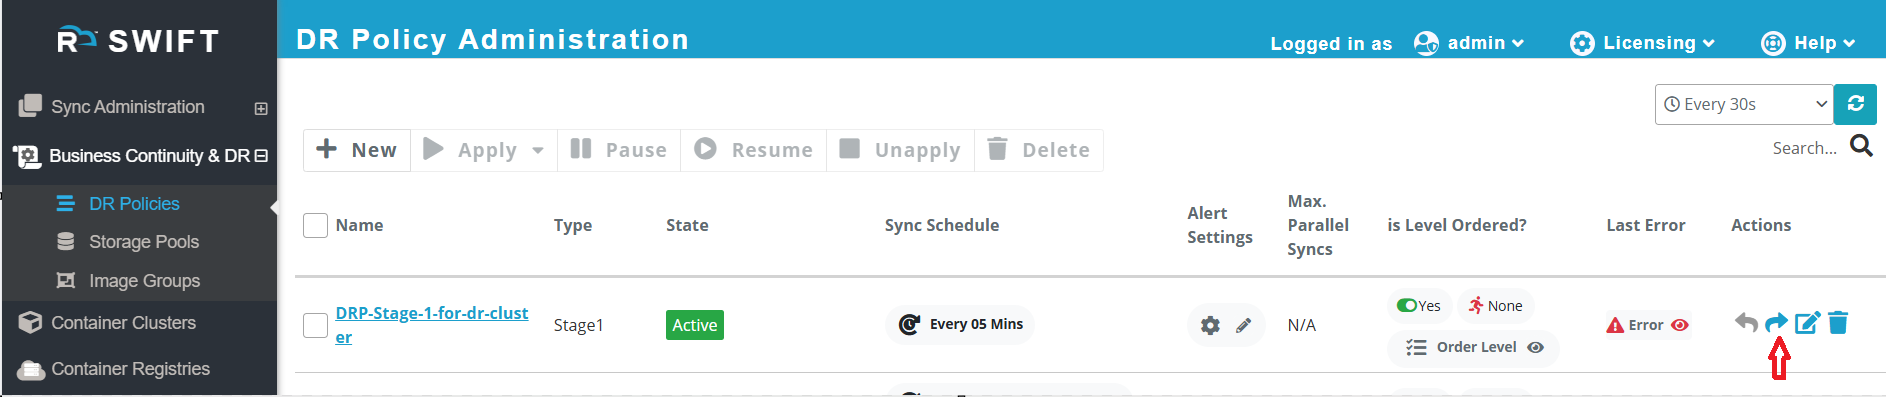
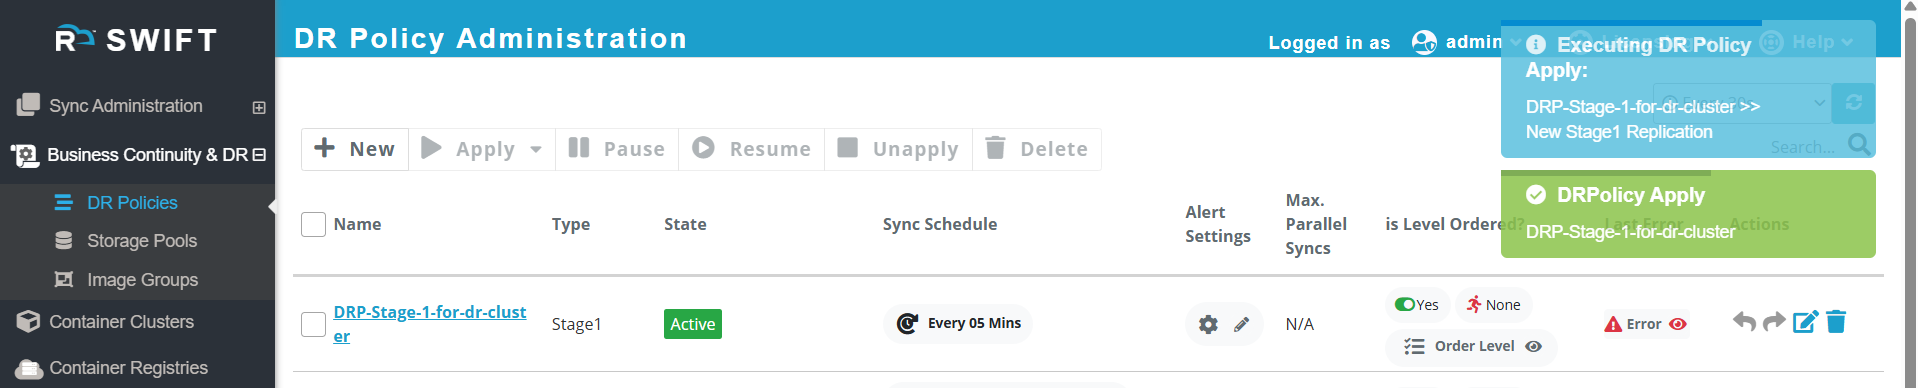
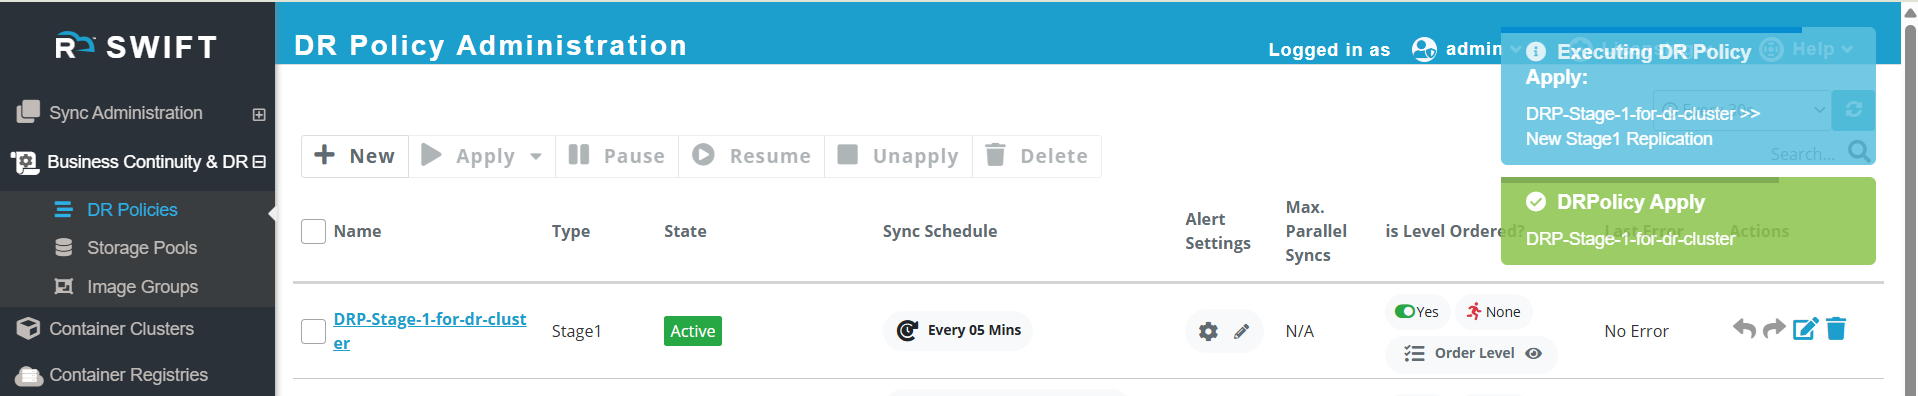
3. Once you click on 'Apply' button, then stage DR Policy will be in 'Active' state.

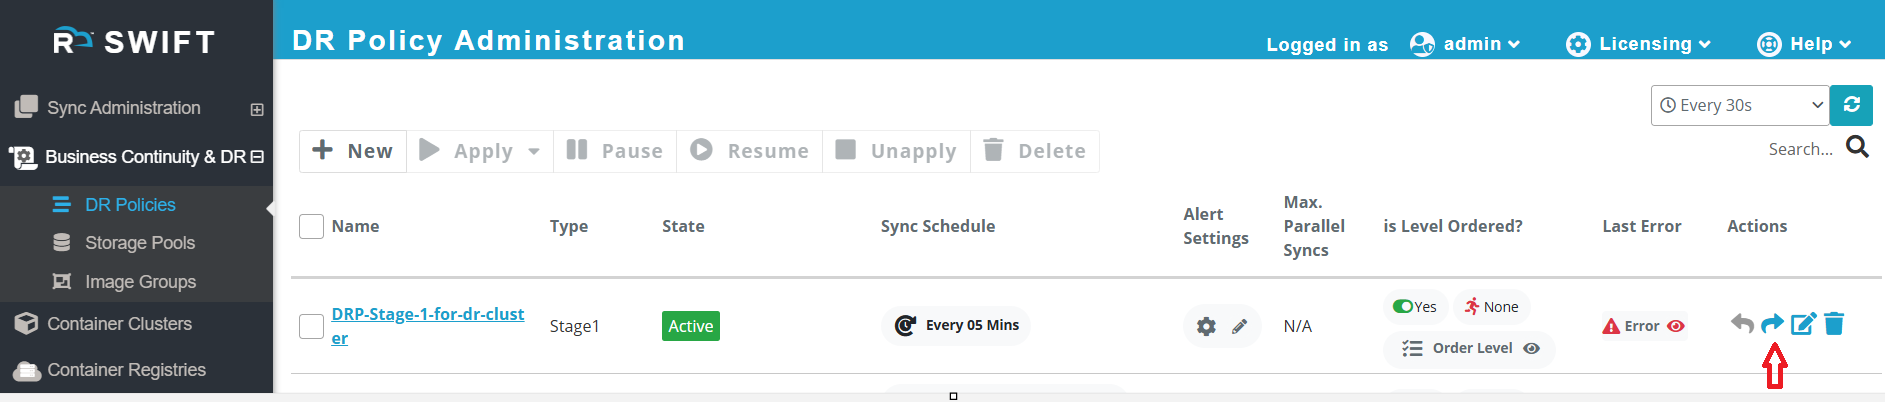
4. To create a DR cluster you need to click on Failover button mentioned below, then cluster will be created.
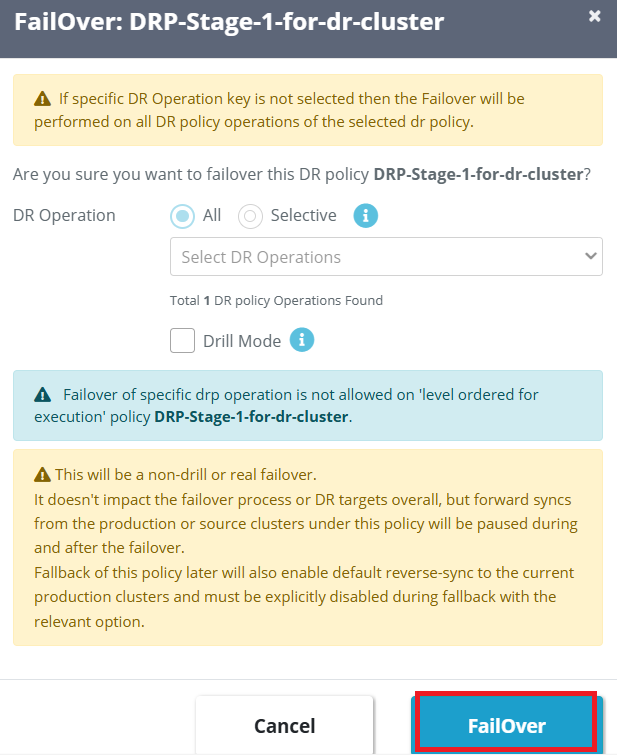
5. Then new window will be appeared, there you need to unclick the DR Drill and click on 'Failover' button, then DR cluster creation will be initiated.
DR Drill = The drill failover will failover the policy by doing one forward sync end to end. The drill mode is assumed to be used for testing of your actual DR drills. In case of a real failover, the forward sync is done as a best attempt (though stage-2 syncs will always be performed if policy is staged sync type). The drill mode is marked with a special policy state.

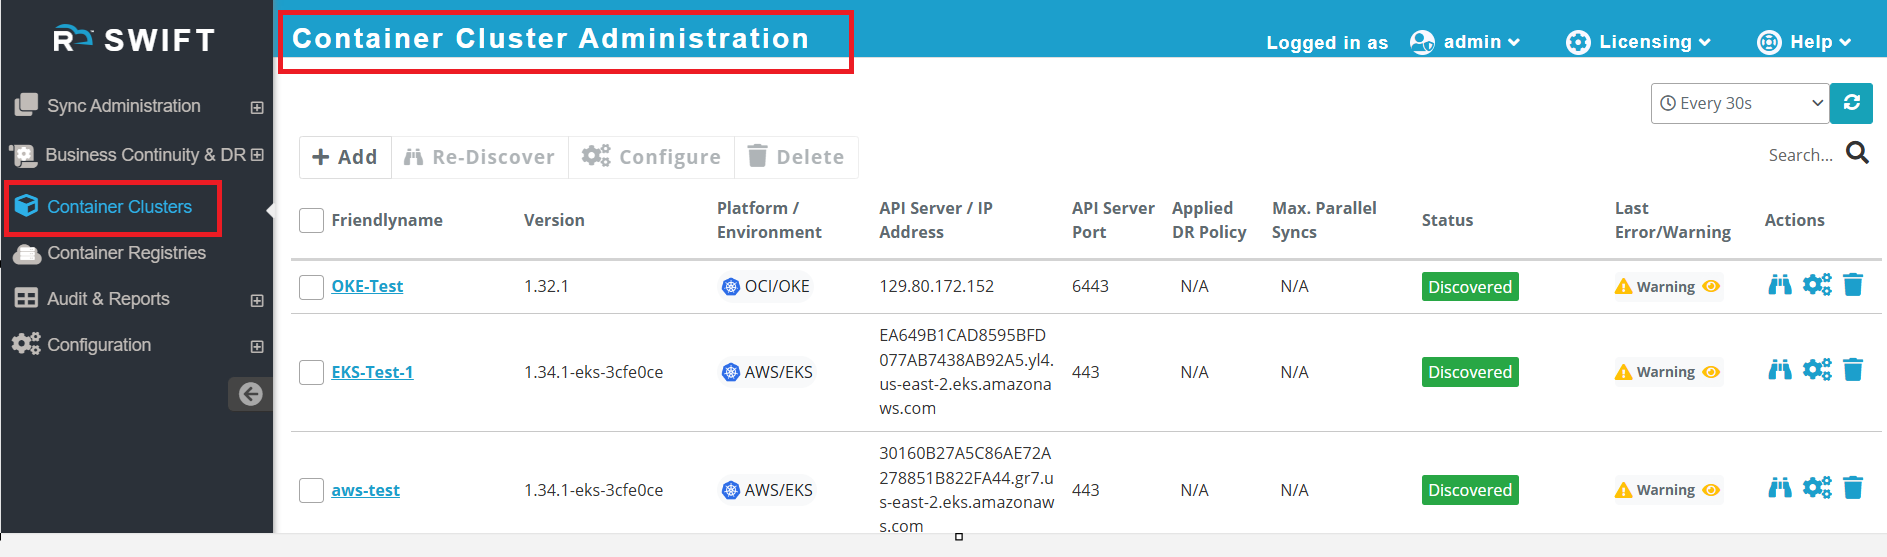
6.If you perform a ‘Failover’, the cluster will be created. You can go to the ‘Container Cluster’ page, where you’ll see the newly created cluster. You can refer to the screenshot below for reference
7. Also, if you want to delete the DR cluster, you can perform the ‘Fallback’ operation. This will automatically sync from DR cluster to source cluster and it delete the DR cluster through SWIFT from clouds, as shown in the screenshot.

8. Once fallback gets completed DR Policy will be in Active state again.
EKS DR Cluster
1. Similarly, you can apply the Stage-1 DR policy with ‘Application Replication with DR Cluster’, then select the AWS cloud type from the dropdown and fill in the required information, similar to how it is done for GCP.

2. Now, you need to fill in the AWS configuration details in the AWS Configuration Details section.

| Fields | Fields Description |
| Access key | Provide the AWS access key |
| Region | Provide the region where you want to create a DR cluster |
| Availability Zones (Optional) | Provide availability zones. |
| AMI Type (Optional) | AMI Type defines the base image (OS + runtime) used by the EKS worker nodes in your cluster. It determines system architecture (x86/ARM), GPU support, and operating system type (Bottlerocket). You can select from dropdown. |
| Instance Type (Optional) | An instance type specifies the CPU, memory, storage, and network capacity for each EC2 instance in your cluster. When SWIFT (or AWS EKS) creates a DR cluster, the instance type determines the performance level of the Kubernetes worker nodes that run your pods. So you can select as per your requirement from drawdown. |
| DR Cluster tag (Optional) | Add tag to organize your resources. For more information, you can click on 'i' button on SWIFT dashboard. |
| Secret key | Provide the secret key as this is the private part of your AWS credentials, used along with the Access Key ID to authenticate SWIFT so it can securely create and manage DR resources in your AWS environment. |
3. Once you click on apply policy will be in active state and then you perform failover to create a EKS DR cluster.


4. If you perform a ‘Failover’, the cluster will be created. You can go to the ‘Container Cluster’ page, where you’ll see the newly created cluster. You can refer to the screenshot below for reference.

5.Similarly, if you want to delete the DR cluster, perform the ‘Fallback’ operation. To do this, click on the ‘Fallback’ button to execute the action. This will automatically sync from DR cluster to source cluster and it delete the DR cluster through SWIFT from clouds. You can refer to the screenshot below.

6. Once fallback gets completed DR Policy will be in Active state again.
Azure DR Cluster
1. Similarly, you can apply the Stage-1 DR policy with ‘Application Replication with DR Cluster’, then select the Azure cloud type from the dropdown and fill in the required information, similar to how it is done for GCP.

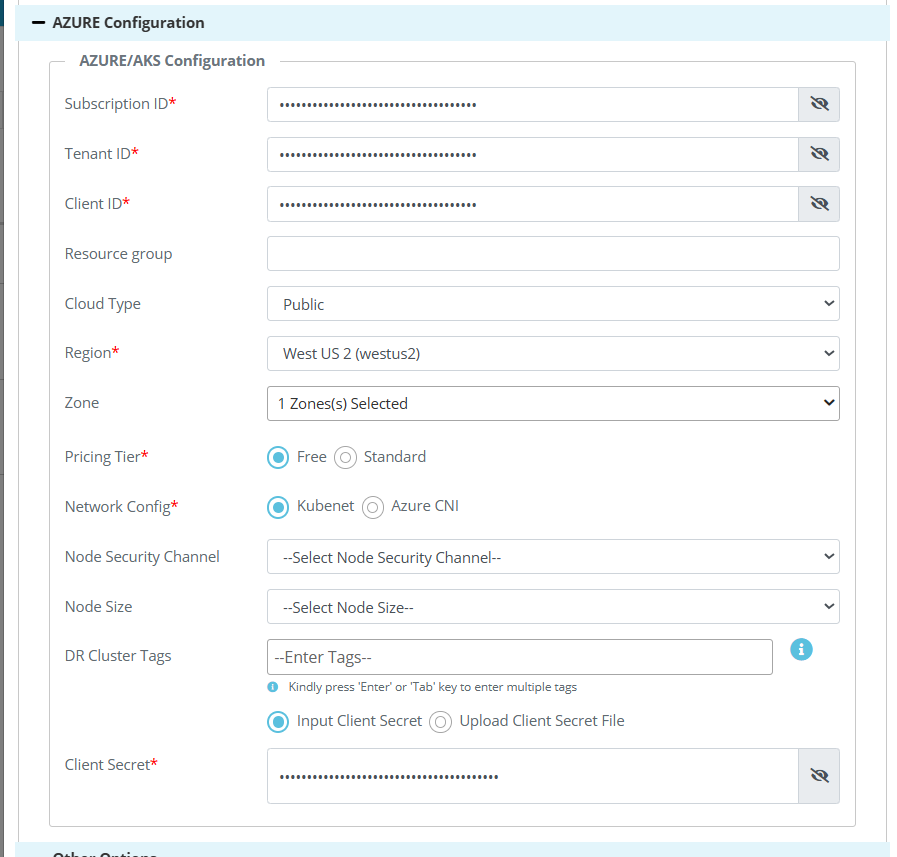
2. Now, you need to fill in the Azure configuration details in the Azure Configuration Details section.

| Fields | Fields Description |
| Subscription ID | Provide subscription ID as Subscription ID in Azure identifies the specific Azure account and billing container under which your DR (AKS) cluster and related resources will be created by SWIFT. |
| Tenant ID | When SWIFT connects to your Azure account to create the DR cluster, it must authenticate against your Azure AD tenant. |
| Client ID | Provide Client ID as Client ID identifies the Service Principal — which is a special identity (like a bot account) that allows tools such as SWIFT to programmatically access Azure. |
| Resource group (Optional) | The Resource Group in Azure is a container for all the resources related to your DR cluster. In SWIFT, you specify it so the DR AKS cluster and its associated components are organized and managed under that group. |
| Region | Provide the region where you want to create a DR cluster |
| Zones (Optional) | You can provide which specific data center(s) within that region your resources run in, providing redundancy and high availability. |
| Pricing Tier | You can select pricing here |
| Network config | Network Configuration defines how pods and nodes are networked inside Azure. You can choose provided options. |
| Node size (Optional) | The Node Size defines the VM type (CPU, memory, and cost) used for each node in your AKS cluster. You can choose from the dropdown. |
| DR Cluster tag (Optional) | Add tag to organize your resources. For more information, you can click on 'i' button on SWIFT dashboard. |
| Client Secret | The Client Secret is the password associated with your Service Principal (App Registration) in Azure. It’s required for SWIFT to authenticate securely and perform operations on your behalf. |
3. Once you click on apply policy will be in active state and then you perform failover to create a AKS DR cluster.


4. If you perform a ‘Failover’, the cluster will be created. You can go to the ‘Container Cluster’ page, where you’ll see the newly created cluster. You can refer to the screenshot below for reference.

5.Similarly, if you want to delete the DR cluster, perform the ‘Fallback’ operation. To do this, click on the ‘Fallback’ button to execute the action. This will automatically sync from DR cluster to source cluster and it delete the DR cluster through SWIFT from clouds. You can refer to the screenshot below.
6. Once fallback gets completed DR Policy will be in Active state again.
OKE DR Cluster
1. You can apply the Stage-1 DR policy with ‘Application Replication with DR Cluster’, then select the Oracle OCI cloud type from the dropdown and fill in the required information, similar to how it is done for GCP.
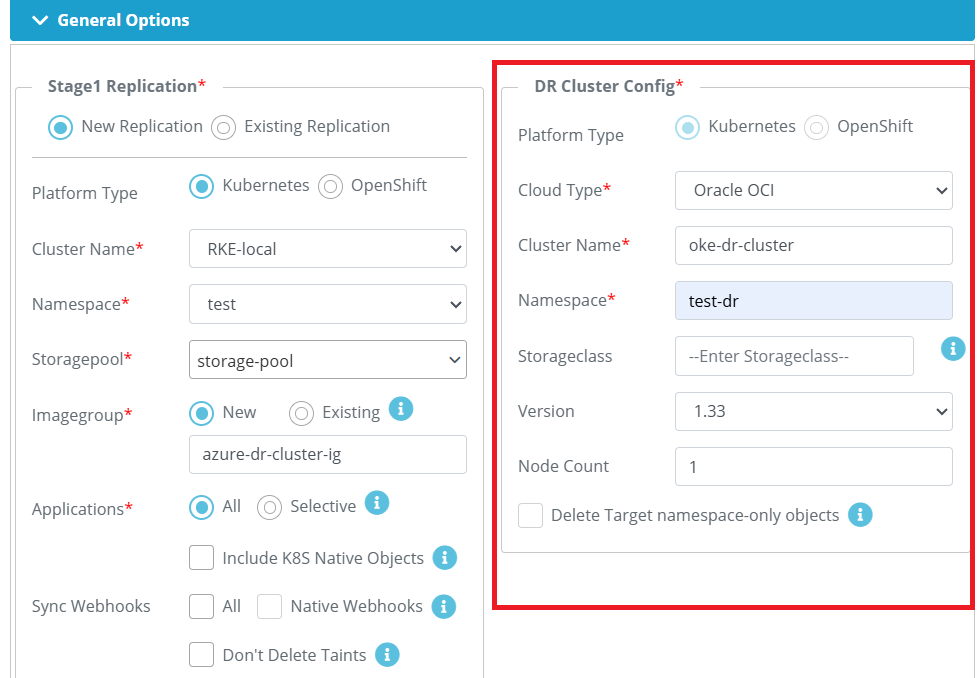
2. Now, you need to fill in the OCI configuration details in the OCI Configuration Details section.
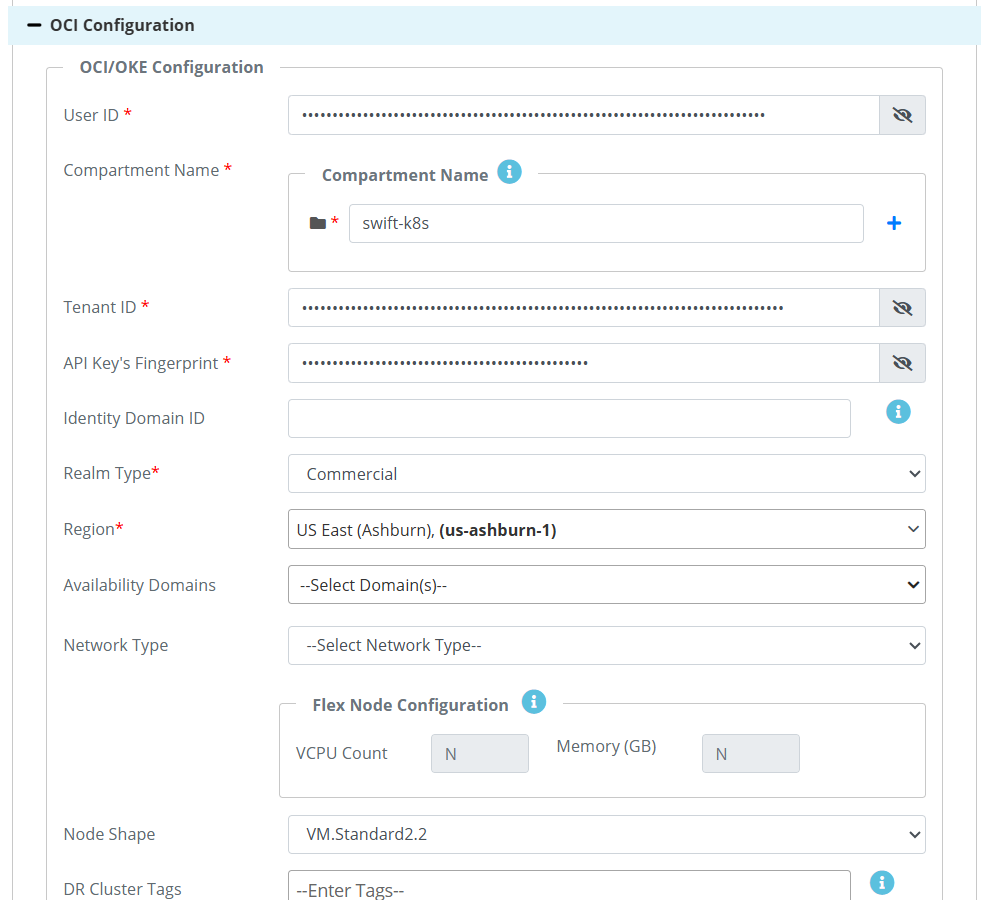
| Fields | Fields Description |
| OCI ID | Provide OCI ID , The OCI ID (also known as User OCID) uniquely identifies the user account in Oracle Cloud. |
| Compartment Name | Provide compartment name, where you want to create a cluster.ChatGPT said: |
| Tenant ID | Provide the tenant ID, tenant ID (also called Tenancy OCID) uniquely identifies your OCI tenancy (the root account for your organization). |
| API Keys fingerprint | Provide API key fingerprint, API Key Fingerprint is a unique identifier for the public key used in API authentication. |
| Realm Type | The Realm Type in Oracle Cloud Infrastructure (OCI) defines the geographical region group or sovereign cloud boundary where your tenancy and resources reside. |
| Availability domain (Optional) | Provide availability domain, An Availability Domain (AD) is a physically separate data center within OCI region. |
| Network Type (Optional) | Defines how your cluster nodes connect within OCI. There are Two types , flannel overlay and OCI vcn. You can provide as per your use case. |
| Node shape (Optional) | Node Shape defines the compute capacity (CPU, memory, and network performance) of each node in your OCI cluster. You can provide any node shape as per your requirement and workload. |
| DR Cluster tag (Optional) | Add tag to organize your resources. For more information, you can click on 'i' button on SWIFT dashboard. |
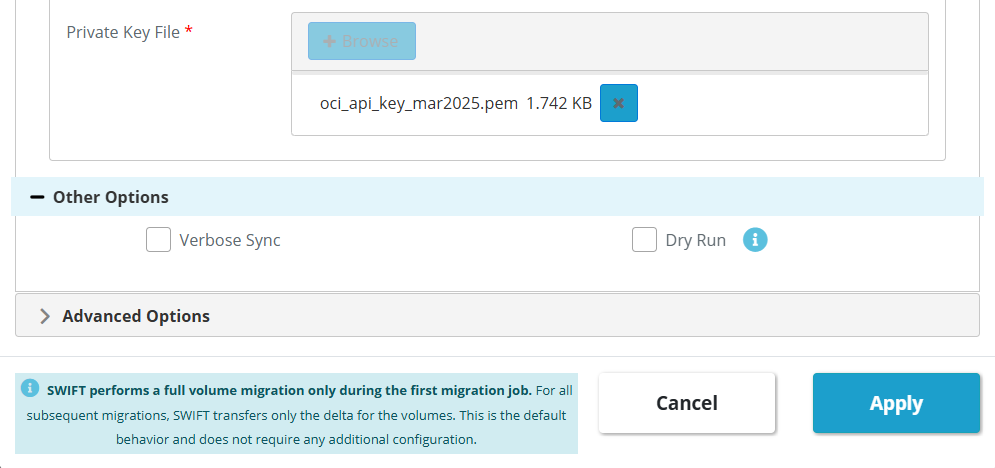
| Private key file | Provide private key file, The Private Key File corresponds to the API key you generated for OCI authentication. It’s used by SWIFT to securely sign API requests to OCI. |
3. Once you click on apply policy will be in active state and then you perform failover to create a OKE DR cluster.

4. If you perform a ‘Failover’, the cluster will be created. You can go to the ‘Container Cluster’ page, where you’ll see the newly created cluster. You can refer to the screenshot below for reference.

5.Similarly, if you want to delete the DR cluster, perform the ‘Fallback’ operation. To do this, click on the ‘Fallback’ button to execute the action. You can refer to the screenshot below.

IKS DR Cluster
1. You can apply the Stage-1 DR policy with ‘Application Replication with DR Cluster’, then select the IBM cloud type from the dropdown and fill in the required information, similar to how it is done for GCP
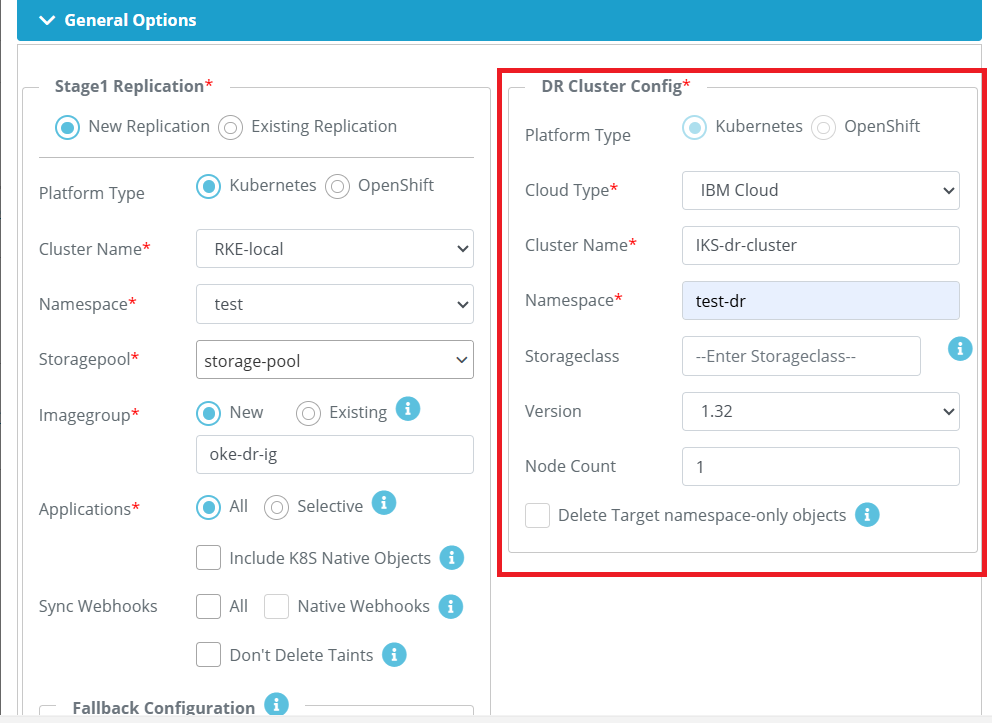
2. Now, you need to fill in the IBM configuration details in the IBM Configuration Details section.

IBM Configuration details as below.
| Fields | Fields Description |
| IBM Cluster type | For IBM DR cluster, by default IBM VPC will be created |
| Region | The Region (also called Metro) represents the geographical location where your IBM Cloud resources and Kubernetes cluster will be hosted. Provide the region as per the resources residing. |
| Zone (Optional) | Provide the zones, that is availability area within a region, each with independent power and networking. |
| Resource group (Optional) | Provide the resource group. Resource Group in IBM Cloud is a logical container that organizes your cloud resources (clusters, storage, VPCs, etc.). |
| Flavor (Optional) | Provide the flavor as per your environment. Flavor defines the compute configuration (vCPUs, memory, and network bandwidth) for the worker nodes in your cluster. |
| DR Cluster tag (Optional) | Add tag to organize your resources. For more information, you can click on 'i' button on SWIFT dashboard. |
| API Key | Provide the API key as IBM Cloud API Key is a secure credential that allows tools like SWIFT to authenticate and perform operations on your behalf (create, manage, or delete DR clusters). |
3. Once you click on apply policy will be in active state and then you perform failover to create a IKS DR cluster.


4. If you perform a ‘Failover’, the cluster will be created. You can go to the ‘Container Cluster’ page, where you’ll see the newly created cluster. You can refer to the screenshot below for reference.

4.Similarly, if you want to delete the DR cluster, perform the ‘Fallback’ operation. To do this, click on the ‘Fallback’ button to execute the action. You can refer to the screenshot below.