Stage 1 is used to back up your application data into SWIFT. It lets you sync your source cluster with SWIFT without running a DR cluster, helping optimize costs. During this sync, all selected cluster volumes are captured and stored as images in the SWIFT database for backup and recovery. When a DR Policy is applied, the backup process is automated and runs on a scheduled basis within SWIFT.
we can write usecase: dont want to provision target cluster, in that case use stage1 DR policy, everything will be in SWIFT side.
Pre-requisite:
2. Source cluster should be added in SWIFT.
3. At least one storage pool created
DR Policy apply steps for Stage1 sync.
1. We first need to apply the Stage1 DR Policy. Go to DR Policies under Business Continuity & DR, click on the created stage-1 DR Policy, then click Apply, and select Application Replication.

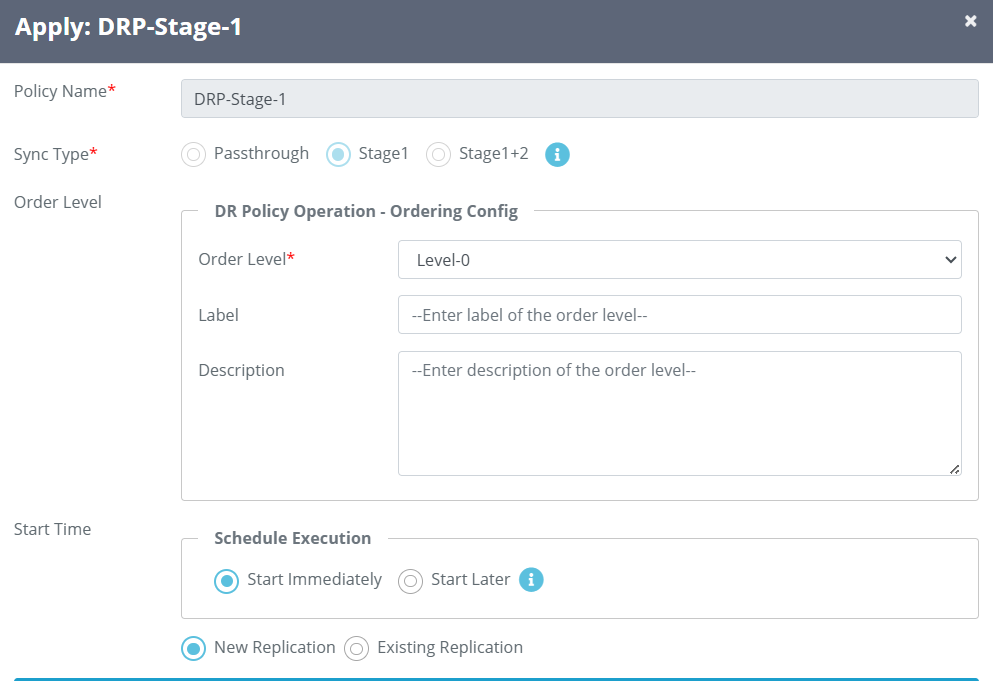
2. After clicking on ‘Application Replication’, a new window will appear as shown below.


| Fields | Fields Description |
| Policy Name | The policy name will be displayed for whichever policy you are applying. |
| Sync Type | Since you created a Stage1 sync mode, it will display the same. |
| Order Level | By default order 0 will be displayed |
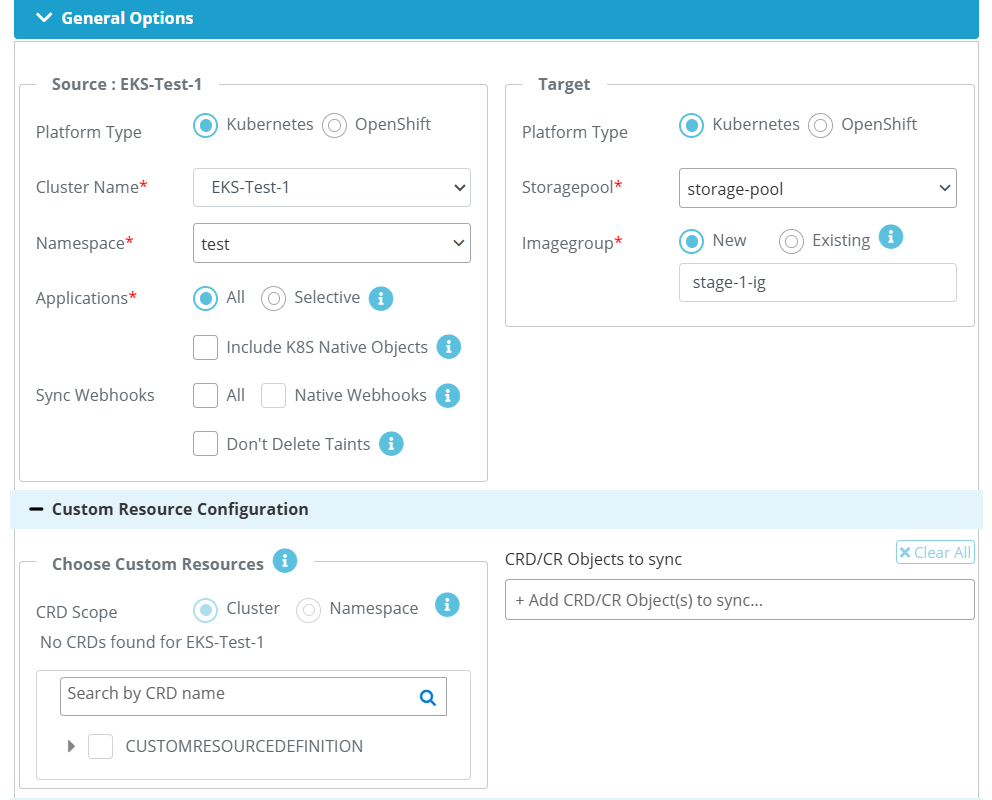
| Patform type | Select the platform where your both cluster is running from source and target |
| Cluster Name | Select the cluster that is for source and target that you want to sync |
| Namespace | Provide the namespace at source side where you source application running. |
| Application | ALL -> Everything in your IG, all objects will be replicated. Selective --> If you want to do only selected object then you can use this option. Include K8S native objects --> Include native k8s objects' ensures that Kubernetes objects like Services, ConfigMaps, Secrets, and Ingress are migrated along with the application |
| Sync webhook (Source side) | ALL --> If you select this, then all webhook that are present in the source, it will migrated to target. Native Webhook --> Includes cluster-level native Kubernetes webhooks during migration. Dont delete the taints --> By default taints going to be deleted, if you dont want this, then you can select this option |
| Storagepool (Target side) | This is pre-requisite , it should be created before start the sync. Need pool for stage1 policy. select it from dropdown. |
| Image Group | We need to provide the image group name it will be created during sync. An Image Group in SWIFT is a collection of volume images captured from an application during the backup or sync process. |
| Exclude applications for replication | If you want to exclude certain application or objects from source side, then you can do from this option |
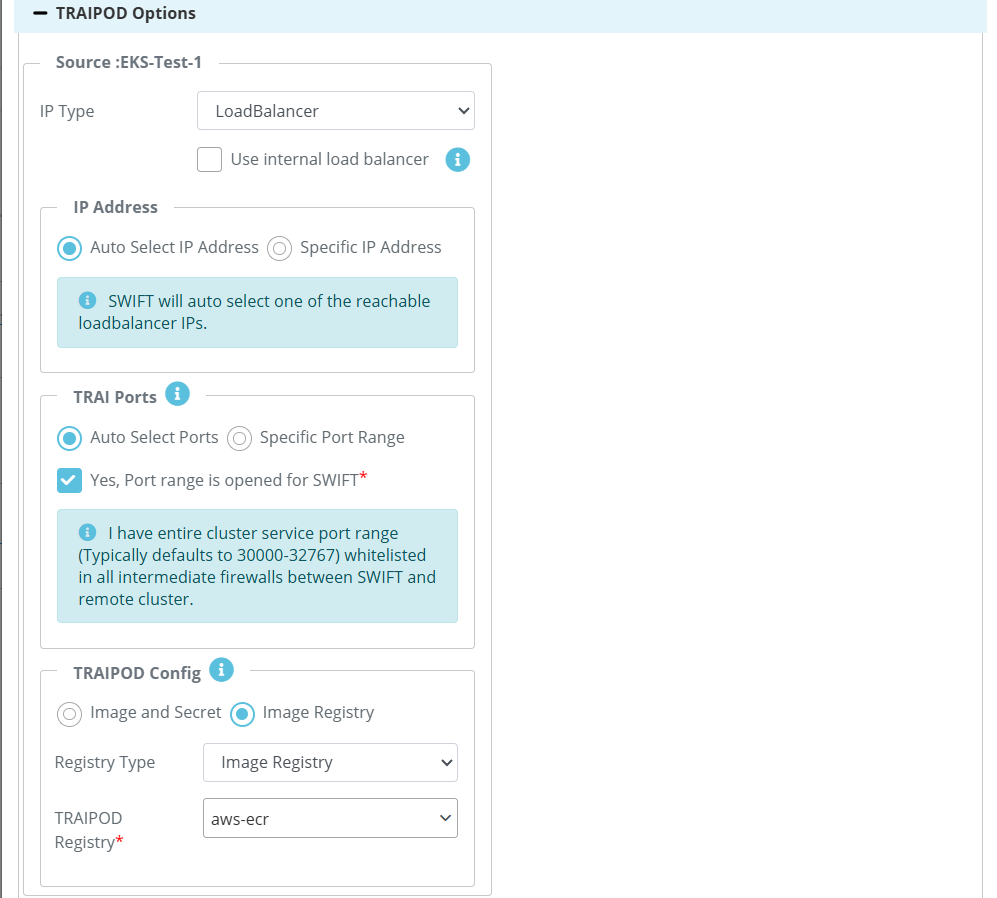
| Traipod Options | In the TRAIPDO section, you can choose either Auto-select Port or specify a Custom Port Range (if you have whitelisted ports between 30000–32767). The selected port will be opened in the cloud firewall accordingly. In the TRAIPDO Config section, you will see two options: 1. If you select 'Image and Secret', you will need to provide the image and its corresponding image secret at both sides. 2. If you select 'Image Registry', you can choose an image registry that has already been added to the container registry at the both sides. check formatting |
3. Once the Stage-1 policy is applied, it will become active and the sync will begin. The sync will run every 5 minutes as per the configured schedule, and you can change the frequency if needed. as per the PT policy

4. You can check the sync by navigating to Application Replication under Sync Administration. There, you will see the Sage-1 sync started by the applied DR Policy. You can also view the DR Policy name. Refer to the screenshot below for reference.

5. Once sync finishes then it will looks like as below.
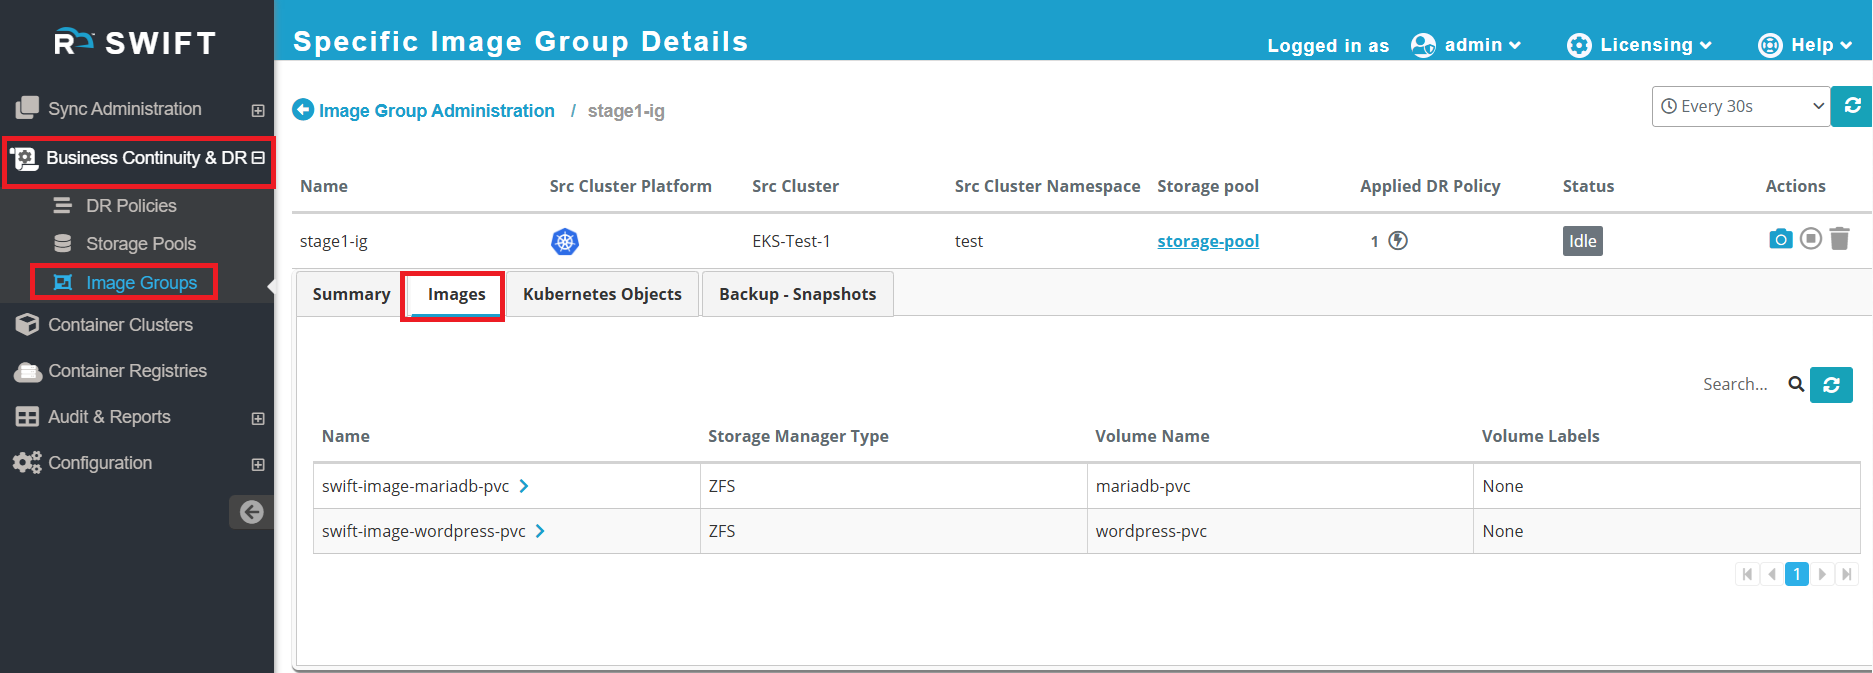
6. You can check in Image groups under 'Business continuity & DR' . There you will see the image group created .
For this go to Image Groups under Business continuity & DR and check correct name that you provided during stage 1 sync.

7. When you click on that Image Groups, you will see the images for the volumes that are backed up in 'Images' tab.

8. Now you can modify the application on the source side, and SWIFT will automatically sync the updated data and applications during the next scheduled sync.
Will add as previous comment with full details. cross verification
Next steps; Dynmaic
