This KB explains how to update an existing Kubernetes Service without deleting or recreating it.
You can change fields such as service type, ports, annotations, or selectors by using a patch command. These updates can be applied quickly through the post-script advanced options, ensuring the service is modified without any downtime.
SWIFT having already this funcanility, but if you want to change something or u want to create a new service, then you can use this way.
Usecase:
1. Change service type when you need to change the service type.
2. Update ports/target ports to match new application or workload requirements.
3. Add or modify annotations for cloud-specific load balancer or networking behavior.
4. We can check by uploading service YAML in chatGPT so that it can be diferent that SWIFT doesnt.
Pre-req:
1. Source and target clusters must be added in SWIFT.
2. You have kubectl installed on the SWIFT VM
3. SWIFT VM has kubeconfig of target cluster
Lets patch the service with SWIFT.
1. We have deployed the WordPress application in demo-wordpress namespace on EKS cluster. Lets access the application with kubectl. Please see below screenshot.

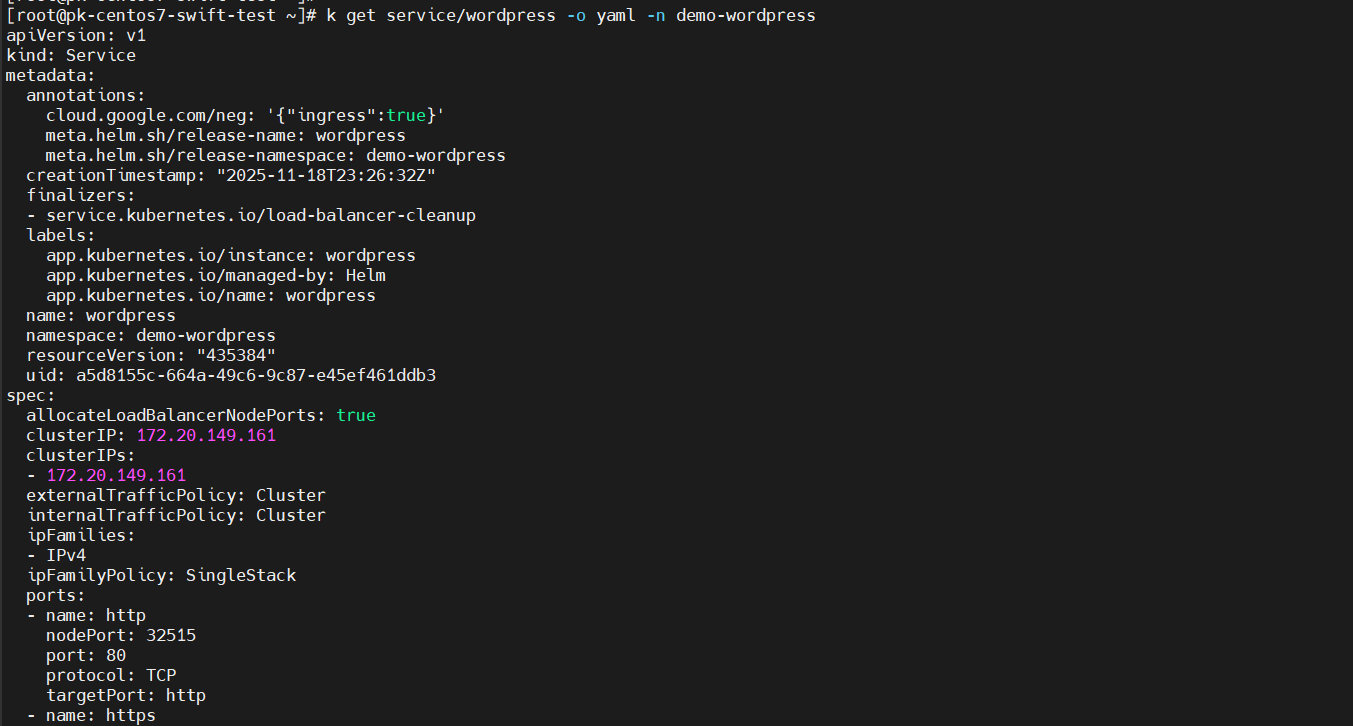
2. And below is the WordPress Service YAML and if want to change the port to the target cluster using SWIFT pre/post option.
#To get the service YAML from cluster. Use below command. go through chatgpt
kubectl get service/wordpress -o yaml -n demo-wordpress
3. To change the port on the target side using SWIFT, you can use the Post Script option.
Create a script that patches the Service on the target cluster using the command below and save it on your machine locally with executable permission. Replace <path-to-target-kubeconfig-file> with actual path. go through chatgpt
export KUBECONFIG=<path-to-target-kubeconfig-file>
kubectl patch service wordpress -n test-gke \
  --type='json' \
  -p='[
    {"op": "replace", "path": "/spec/ports/0/port", "value": 8080}
  ]'
4. Login to SWIFT Dashboard and add EKS and GKE cluster.

5. After that, go to ‘Sync Administration’ → click on ‘All Replications’ → click on ‘New’ → select ‘Application Replication’ → and choose ‘Passthrough Replication’.

6. Provide the clusters and namespace at both source and target side.

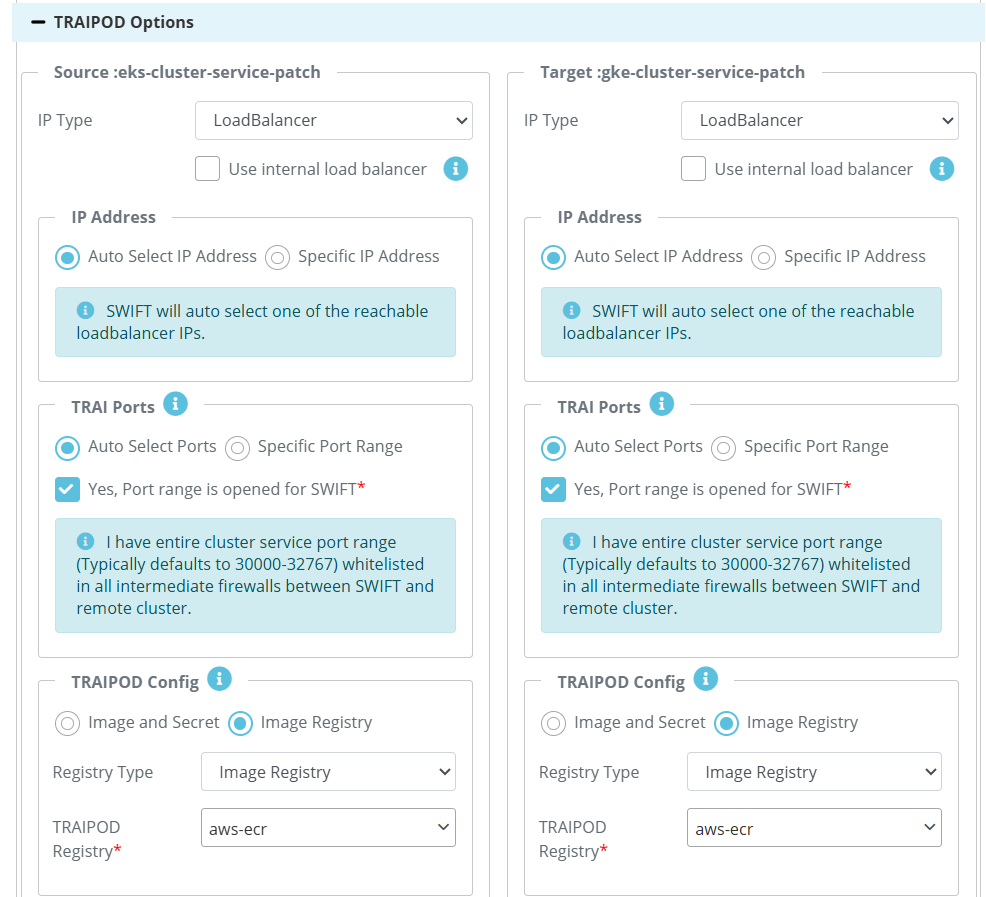
7. Now go to the ‘Advanced Options’ tab and select the Pre/Post Script configuration. Browse and upload your post script, which should contain the patch command.


8. Once click on 'Add' button ,then sync will be started. To see, Go to All replication under 'Sync Administration' .

9. Once the sync is completed, you can verify whether the port 8080 has been patched by accessing the application.”

10. As shown in the screenshot below, the 8080 port has been successfully patched for the WordPress Service.

#also you can verify in service YAML.

Add KB article of advanced option