
Overview
This article provides a step-by-step guide to deploy SWIFT from the AWS Marketplace. It explains how to find the RackWare SWIFT product, select a purchase option, choose a launch method, configure the required deployment settings, and launch the SWIFT instance on AWS.
1. Login to the AWS Cloud.
2. Search AWS Marketplace on AWS console and click on AWS Marketplace.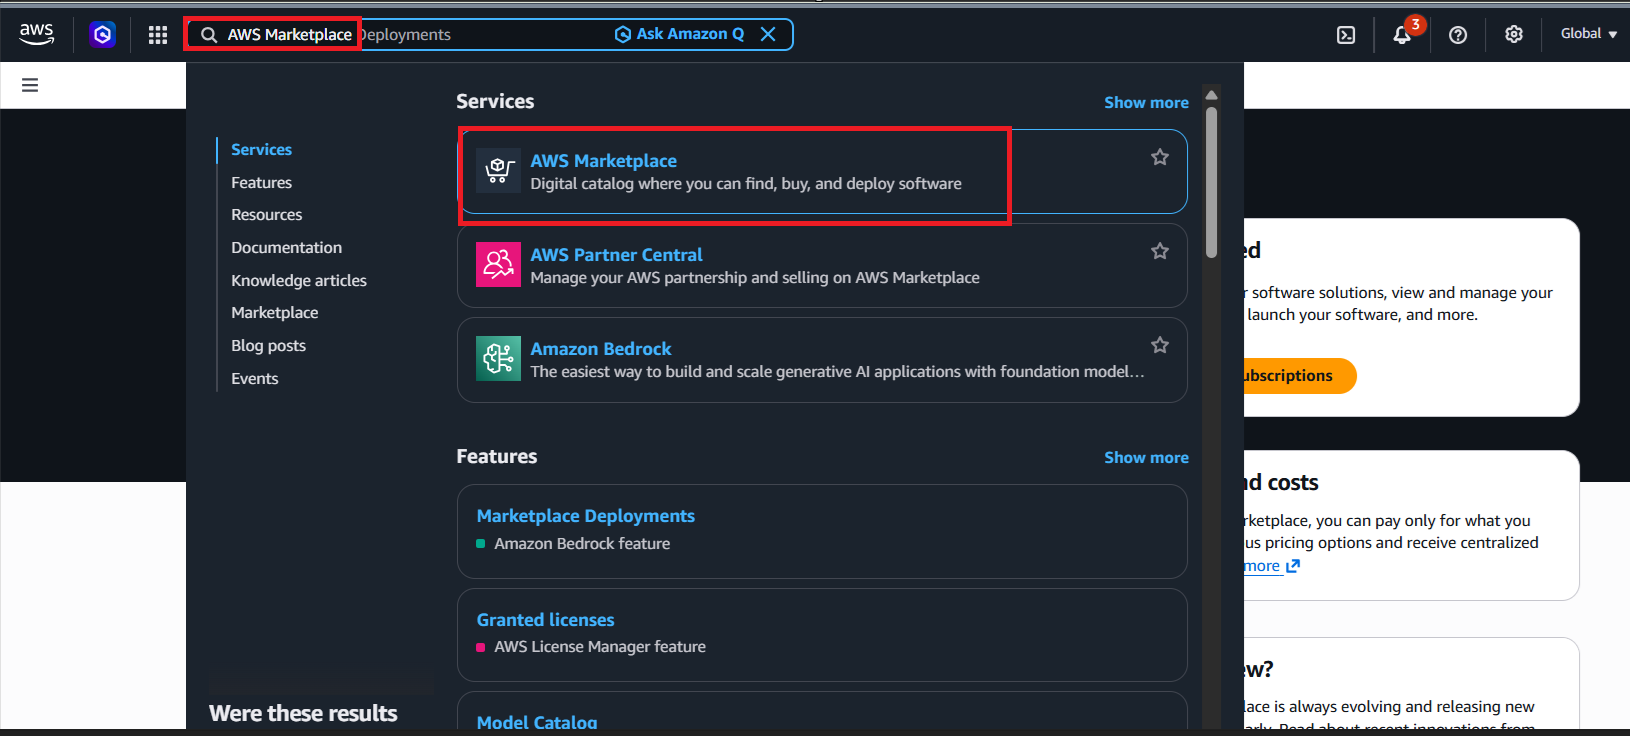
3. Once you are on the AWS Marketplace page, click Discover products. In the search bar, enter RackWare SWIFT and search for the product and click on that Product.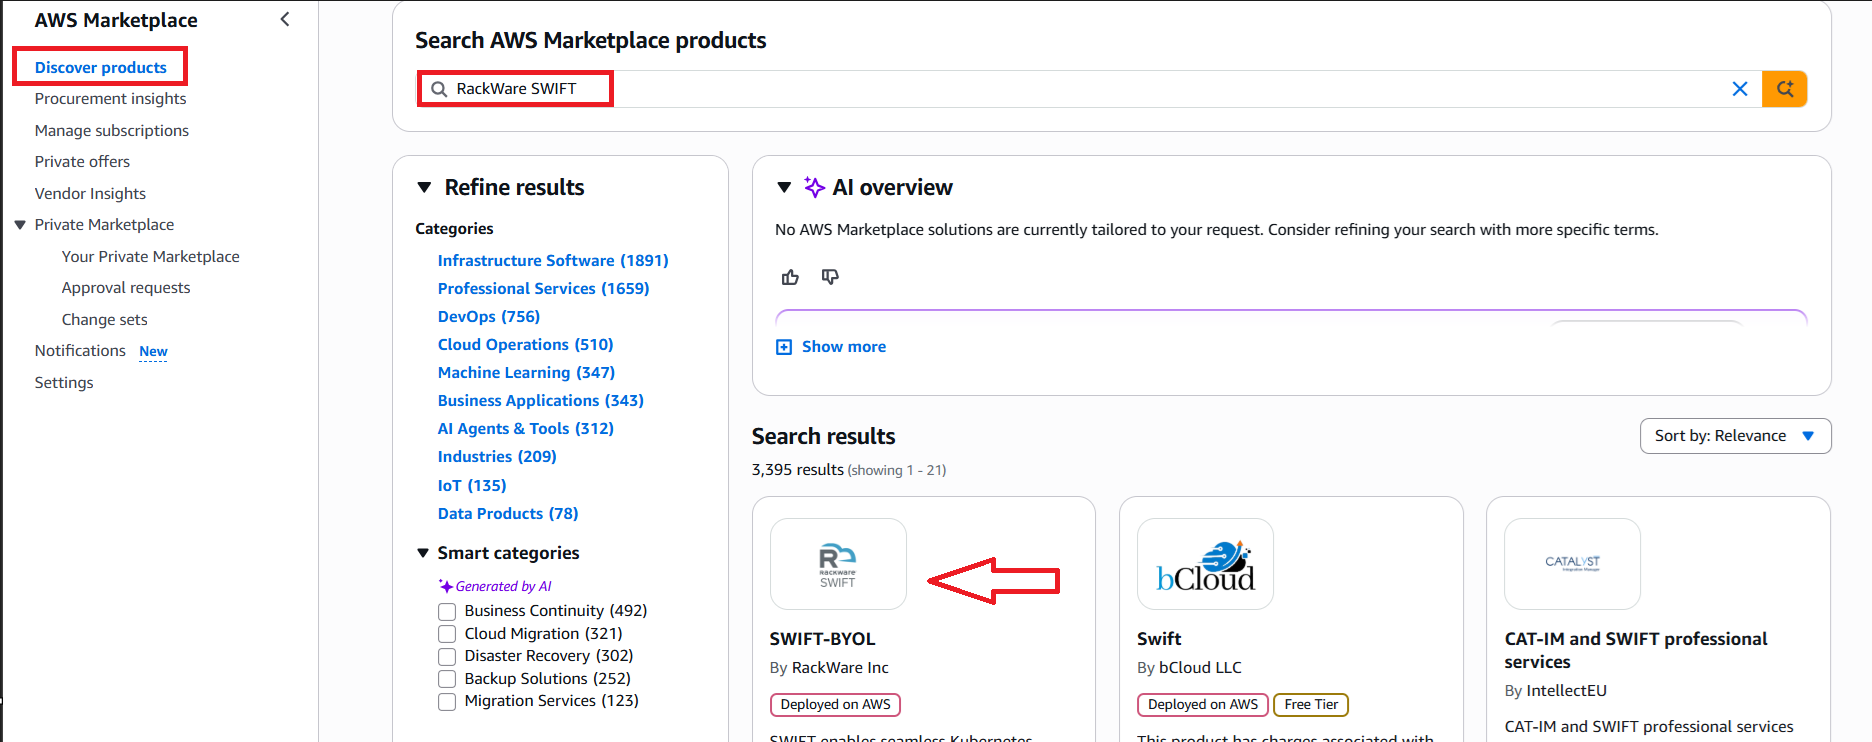
4. When you click on the product, you will be redirected to the RackWare SWIFT product page. Click View purchase options.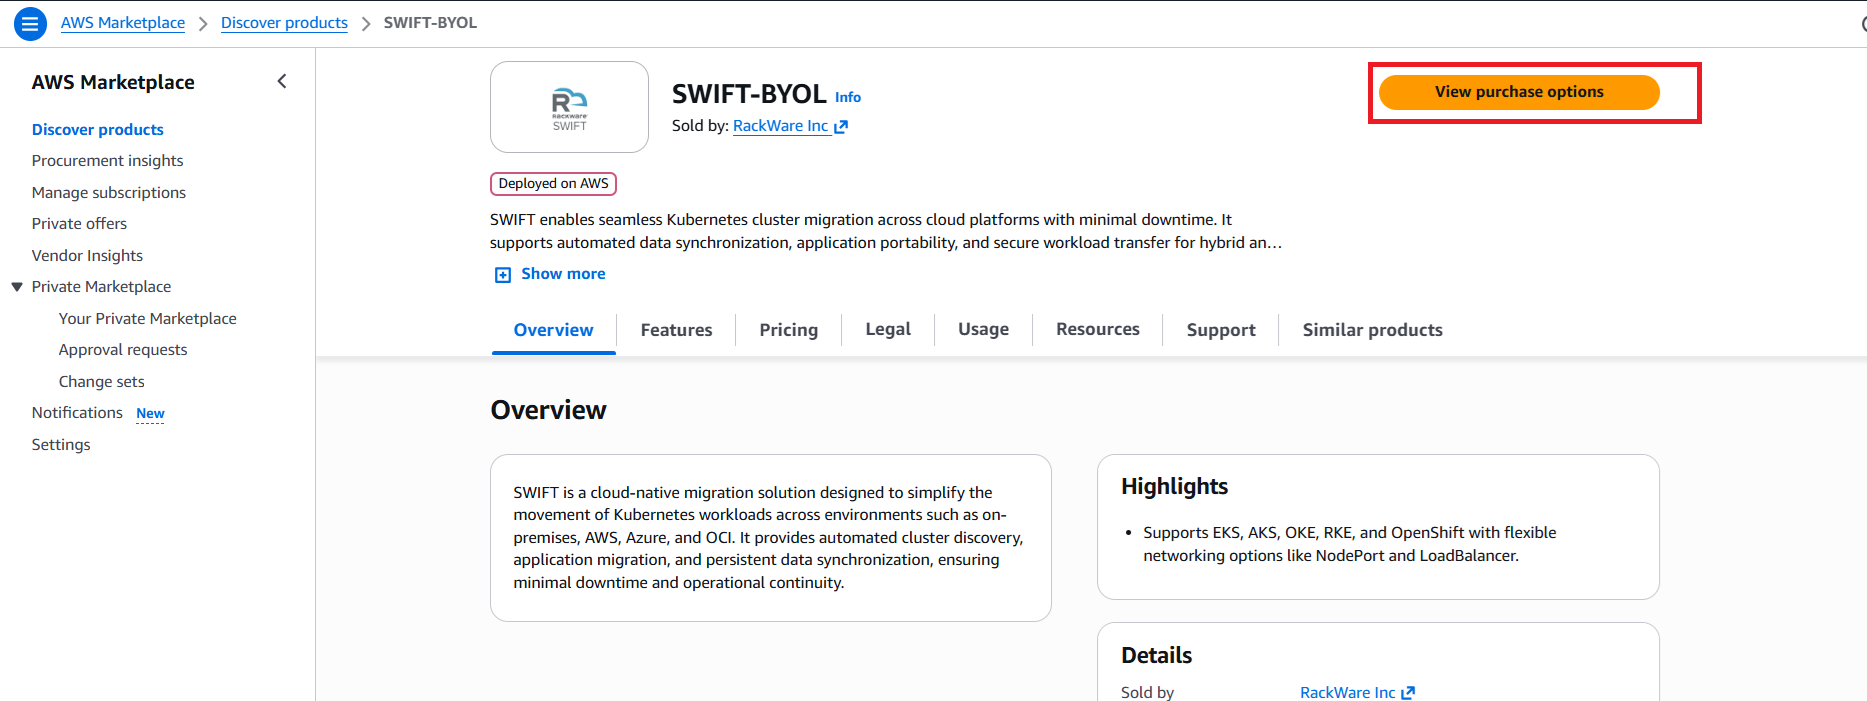
5. Now, click Launch your software. 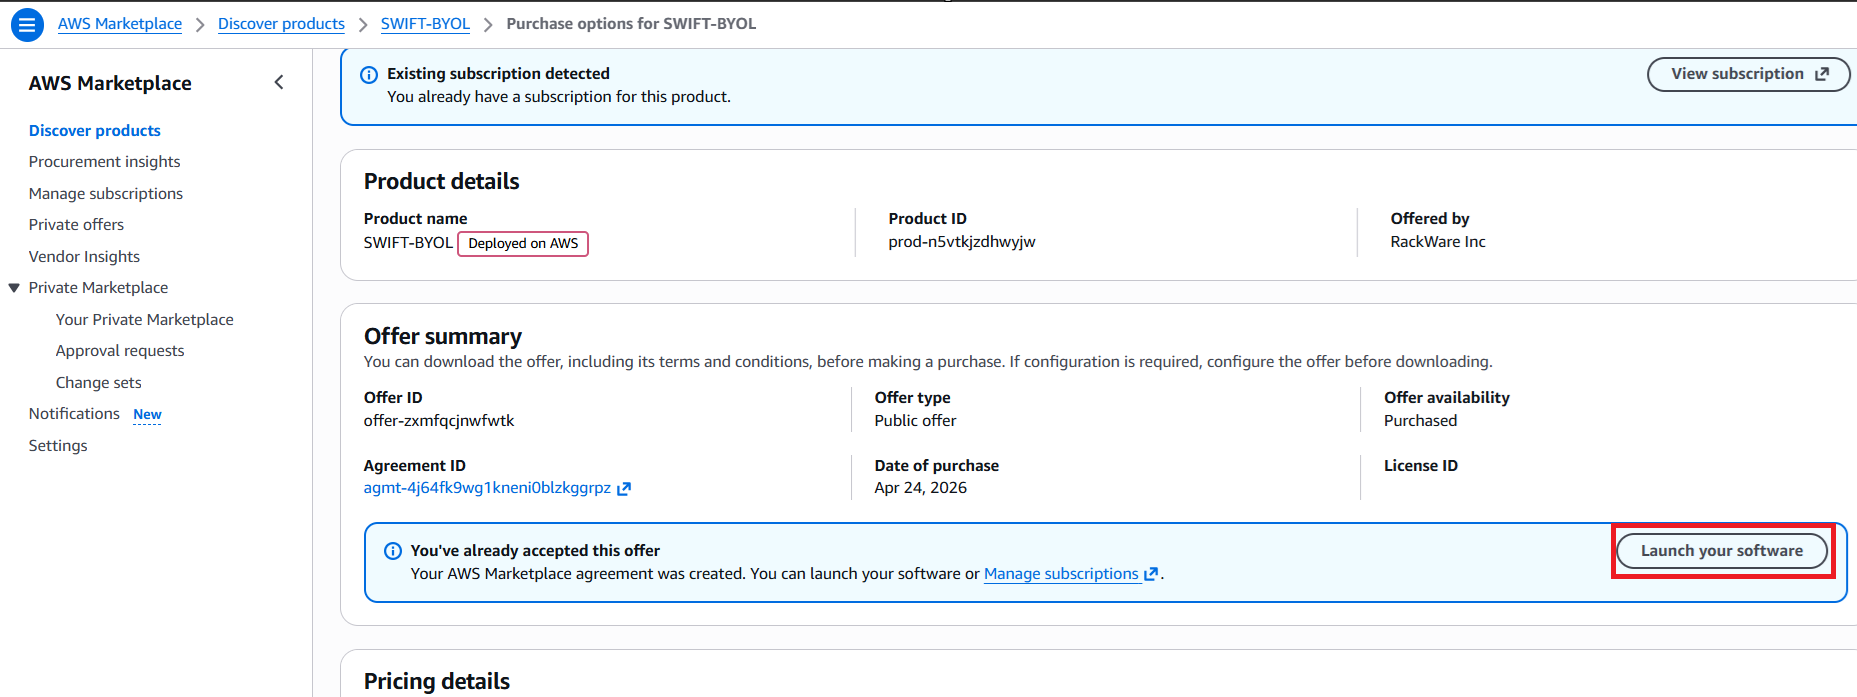
6. Choose a Launch Method
On the Launch SWIFT-BYOL page, you can choose one of the following launch methods based on your requirements:
Option 1: Launch from EC2 Console.
Select Launch from EC2 Console if you prefer to configure the instance directly from the Amazon EC2 console.
Select Launch from EC2 Console > Choose the AWS Region where you want to deploy SWIFT > Click Launch from EC2 > You will be redirected to the EC2 console, where you can complete the instance configuration and launch SWIFT.
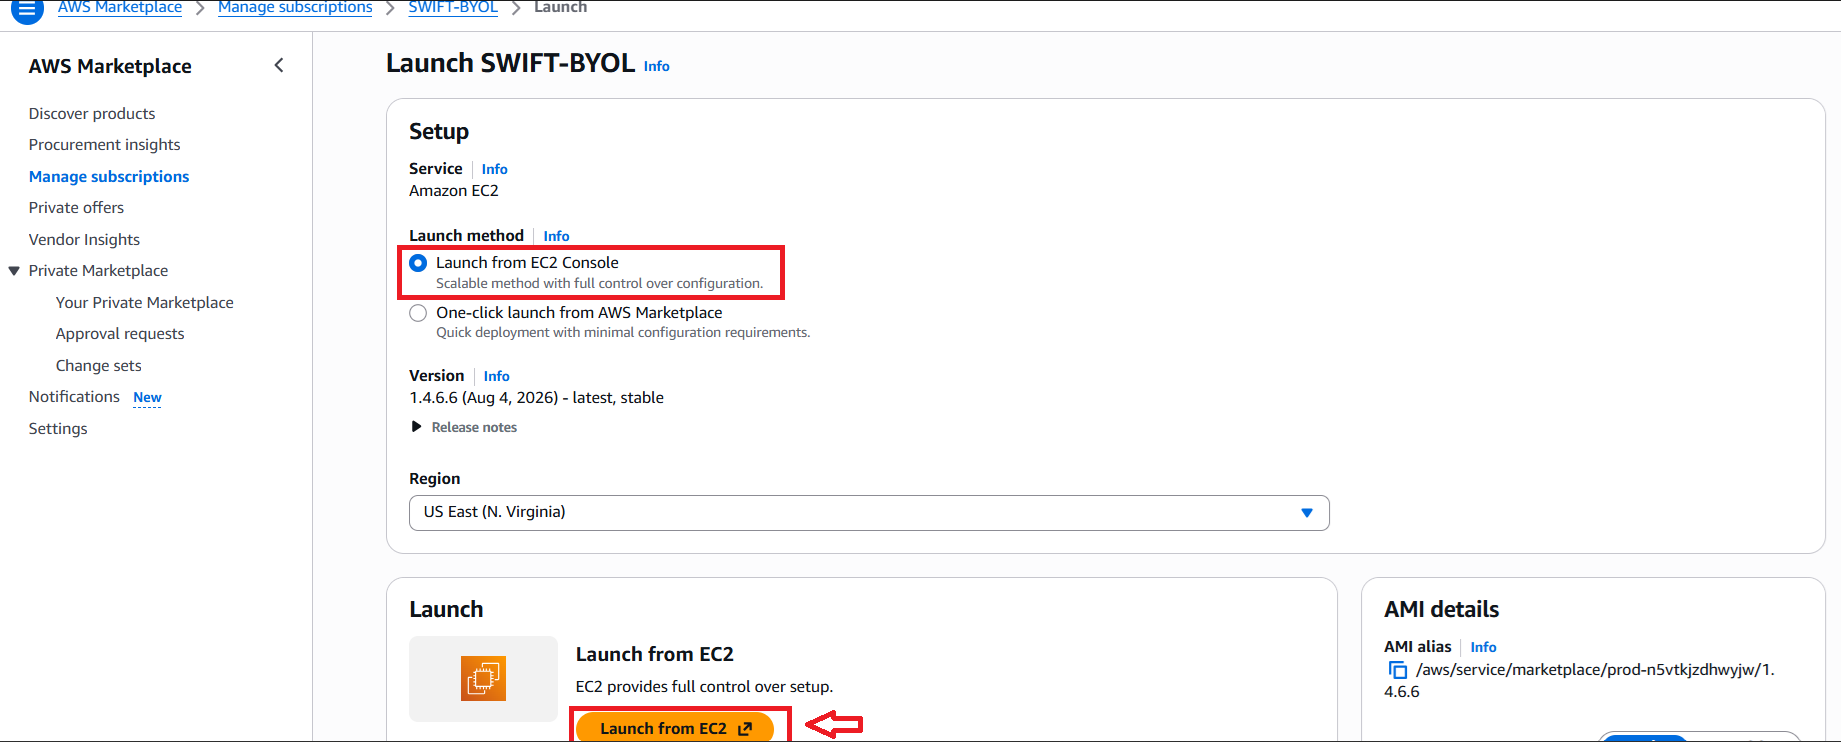
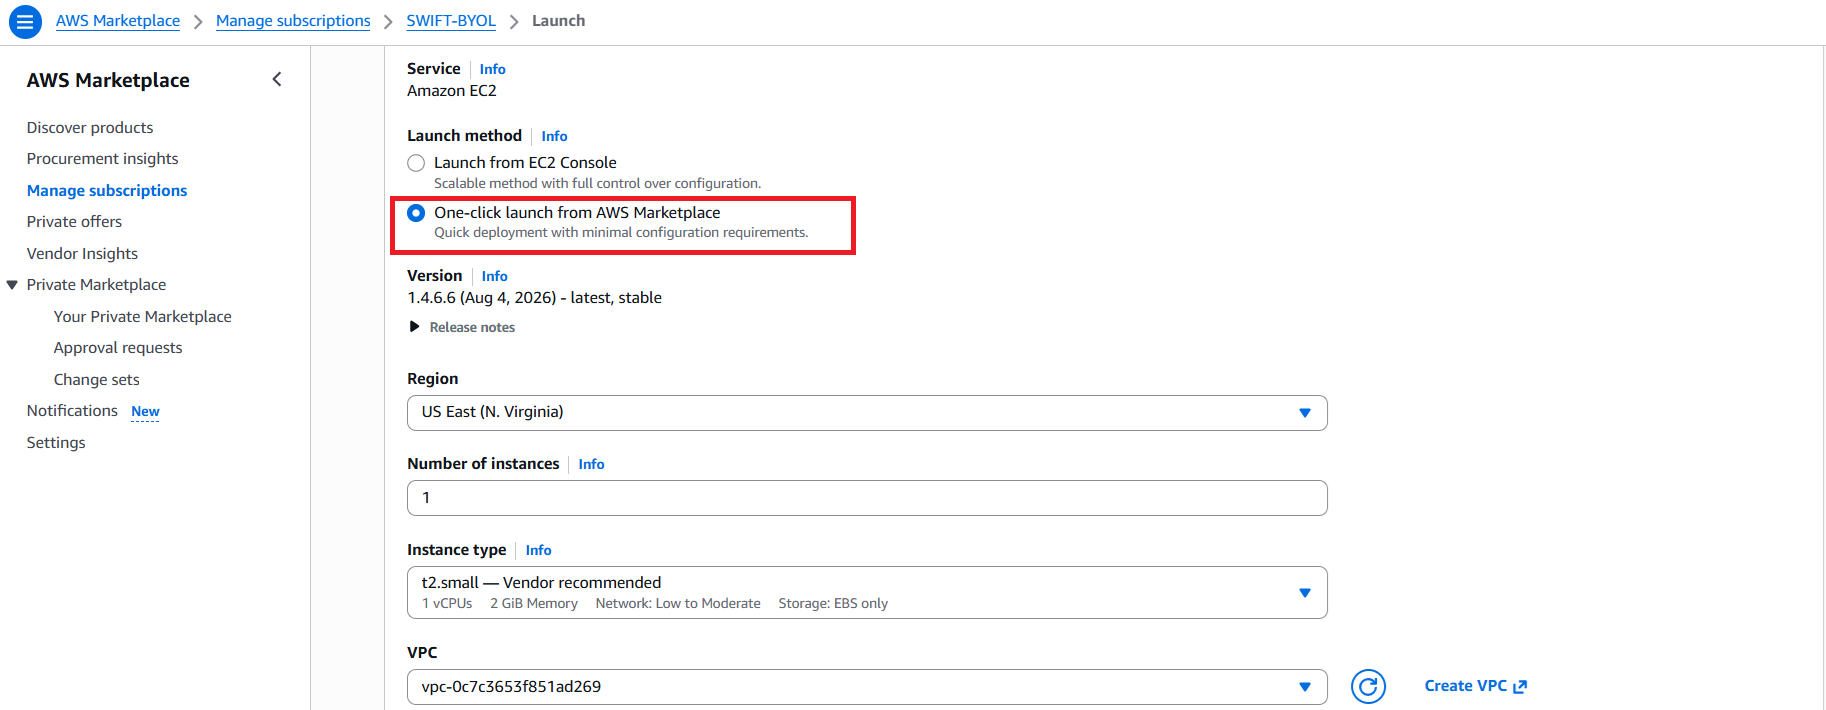
Option 2: One-click launch from AWS Marketplace
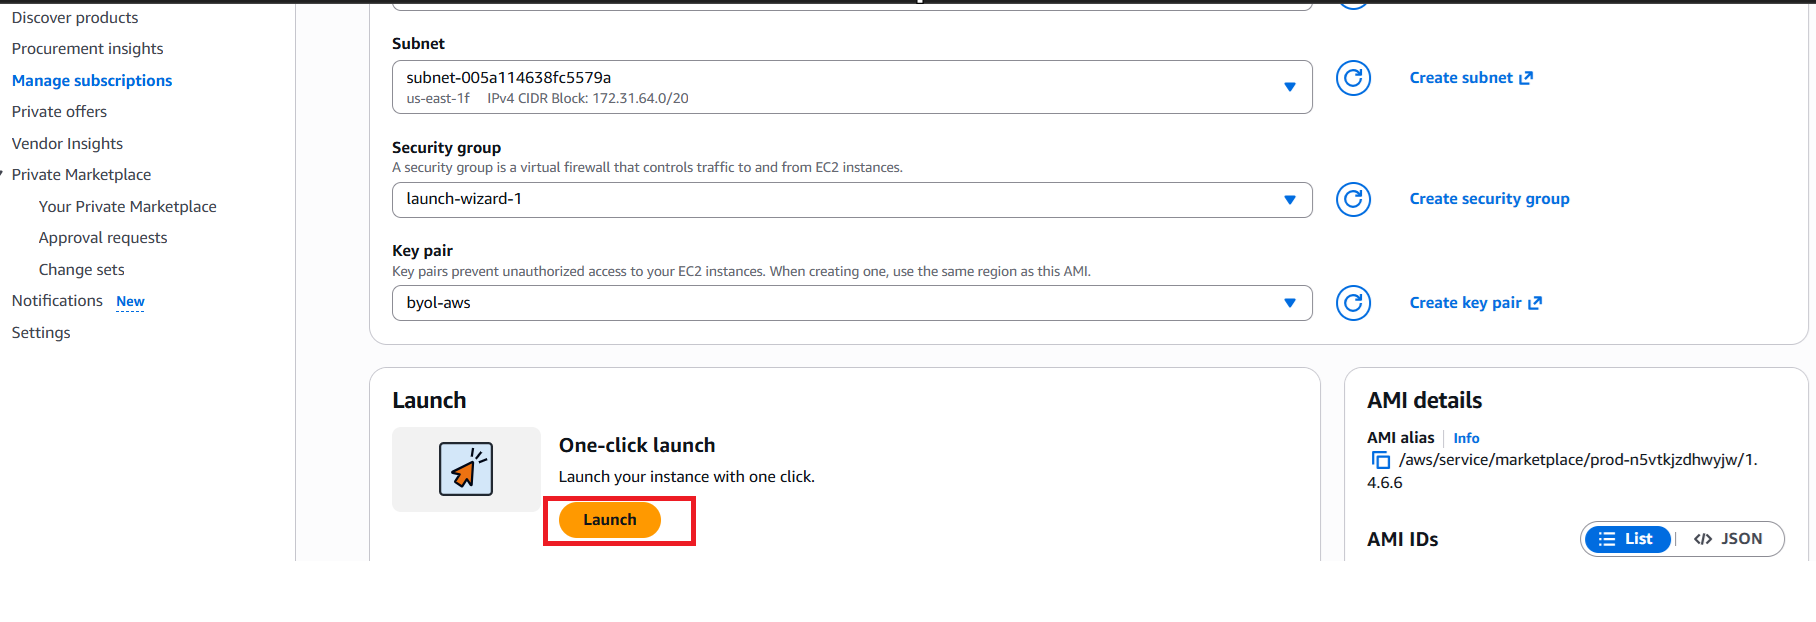
Select One-click launch from AWS Marketplace for a quicker deployment with the required configuration options available on the Marketplace page.
You need to provide the following details:
- AWS Region
- Number of instances
- Instance type
- VPC
- Subnet
- Key pair
- Other required network and security settings
After providing the required configuration details, click Launch to deploy the SWIFT instance.
Note: Choose the launch method that is most convenient for your deployment requirements.
7. You can connect to the created instance with default "ec2-user" user and check the SWIFT version and license first to verify that SWIFT has been deployed correctly. Please find below the commands to run on the created VM.
#Chnage to root user
sudo su -
#Displays the installed SWIFT version.
sc swift show#Displays the SWIFT license information.
sc st sh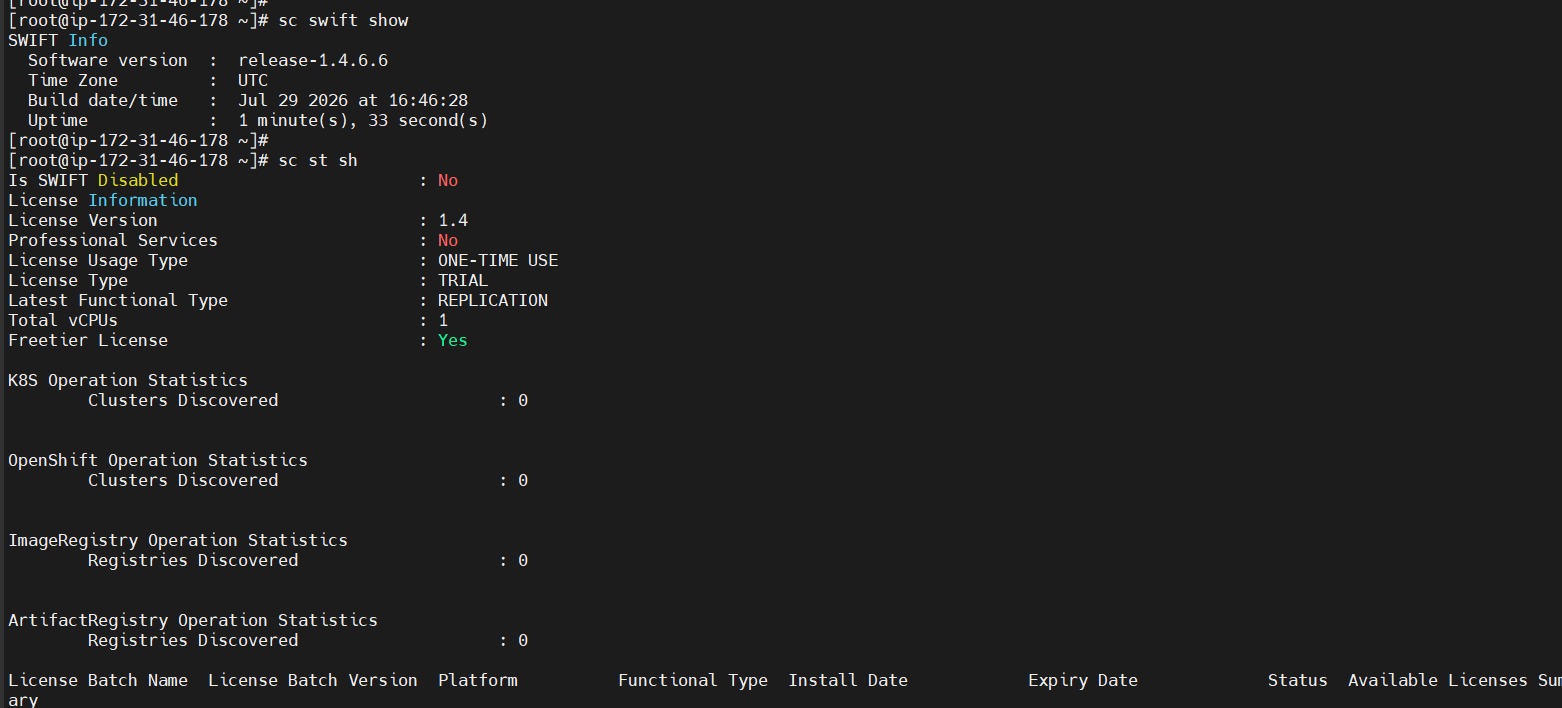
8. Set up the password for admin user with below command and access the SWIFT dashboard.
Set up the password for the admin user using the following command:
sc user modify admin --password "<your-password>"
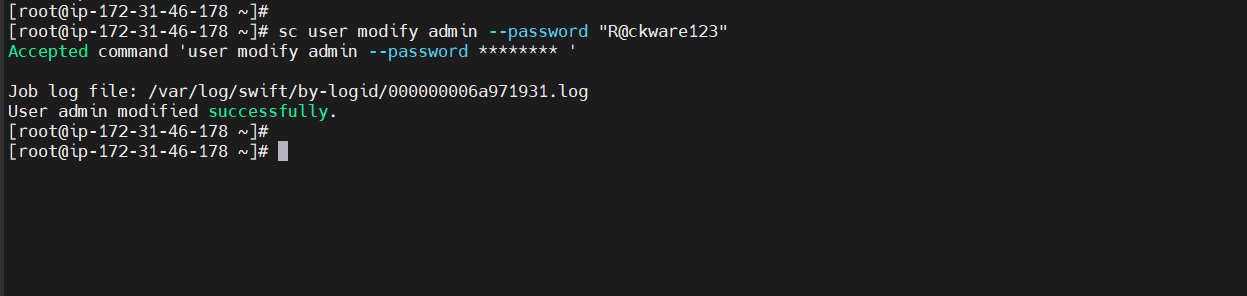
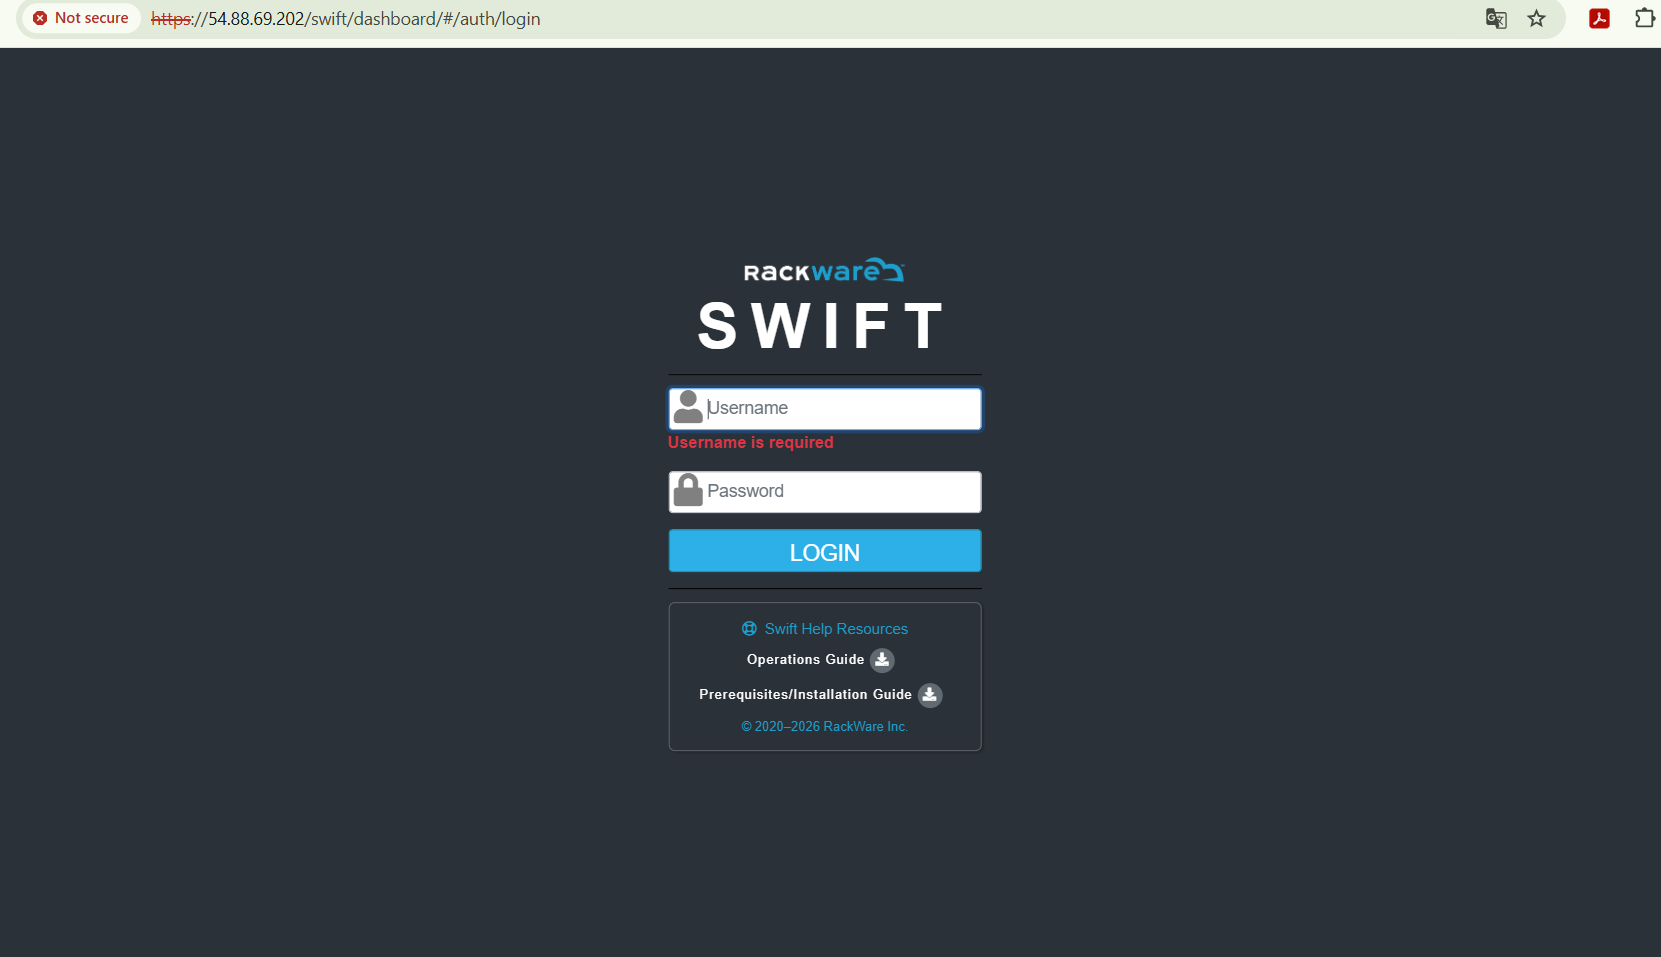
After setting the password, access the SWIFT Dashboard using the following URL:
https://<swift-ip>/swift/dashboard/
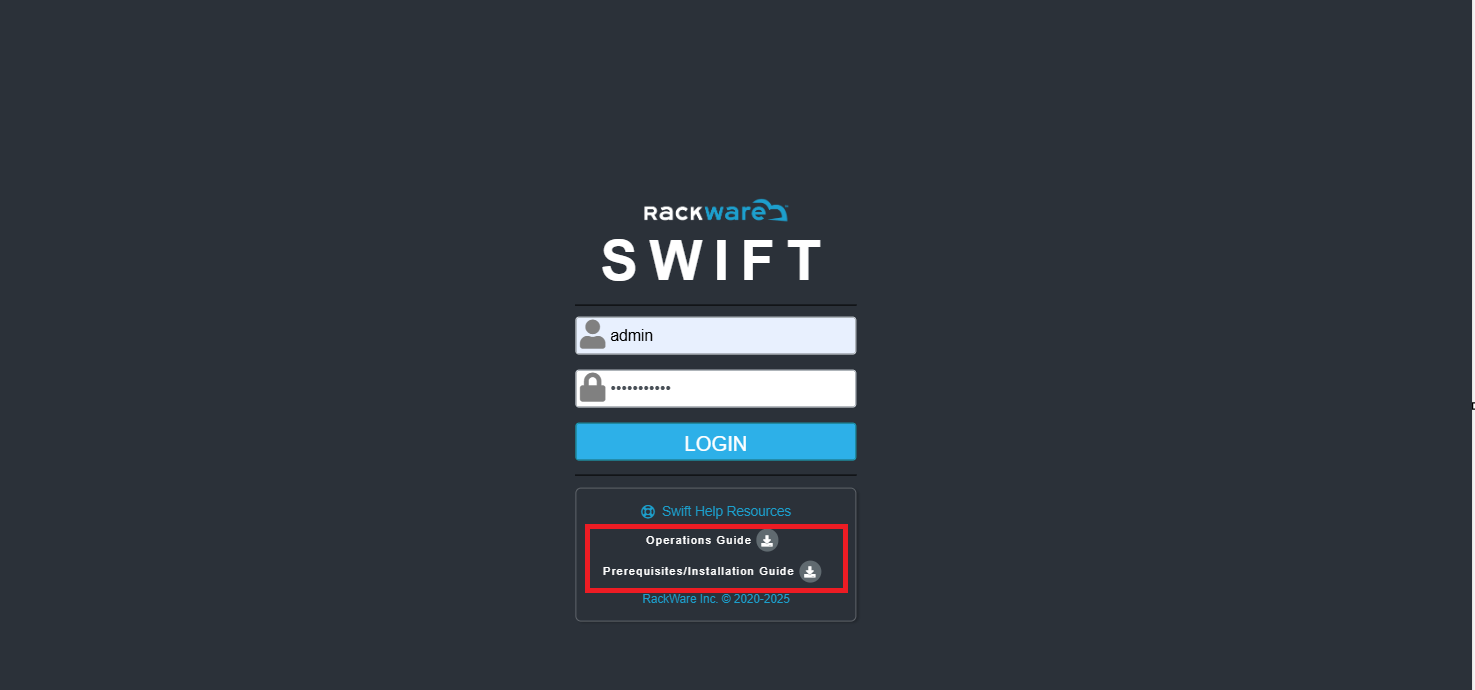
9. You can also download the Operations Guide and Pre-requisites/Installation Guide from the dashboard. Simply click on the respective links. Please refer to the screenshot below for guidance.
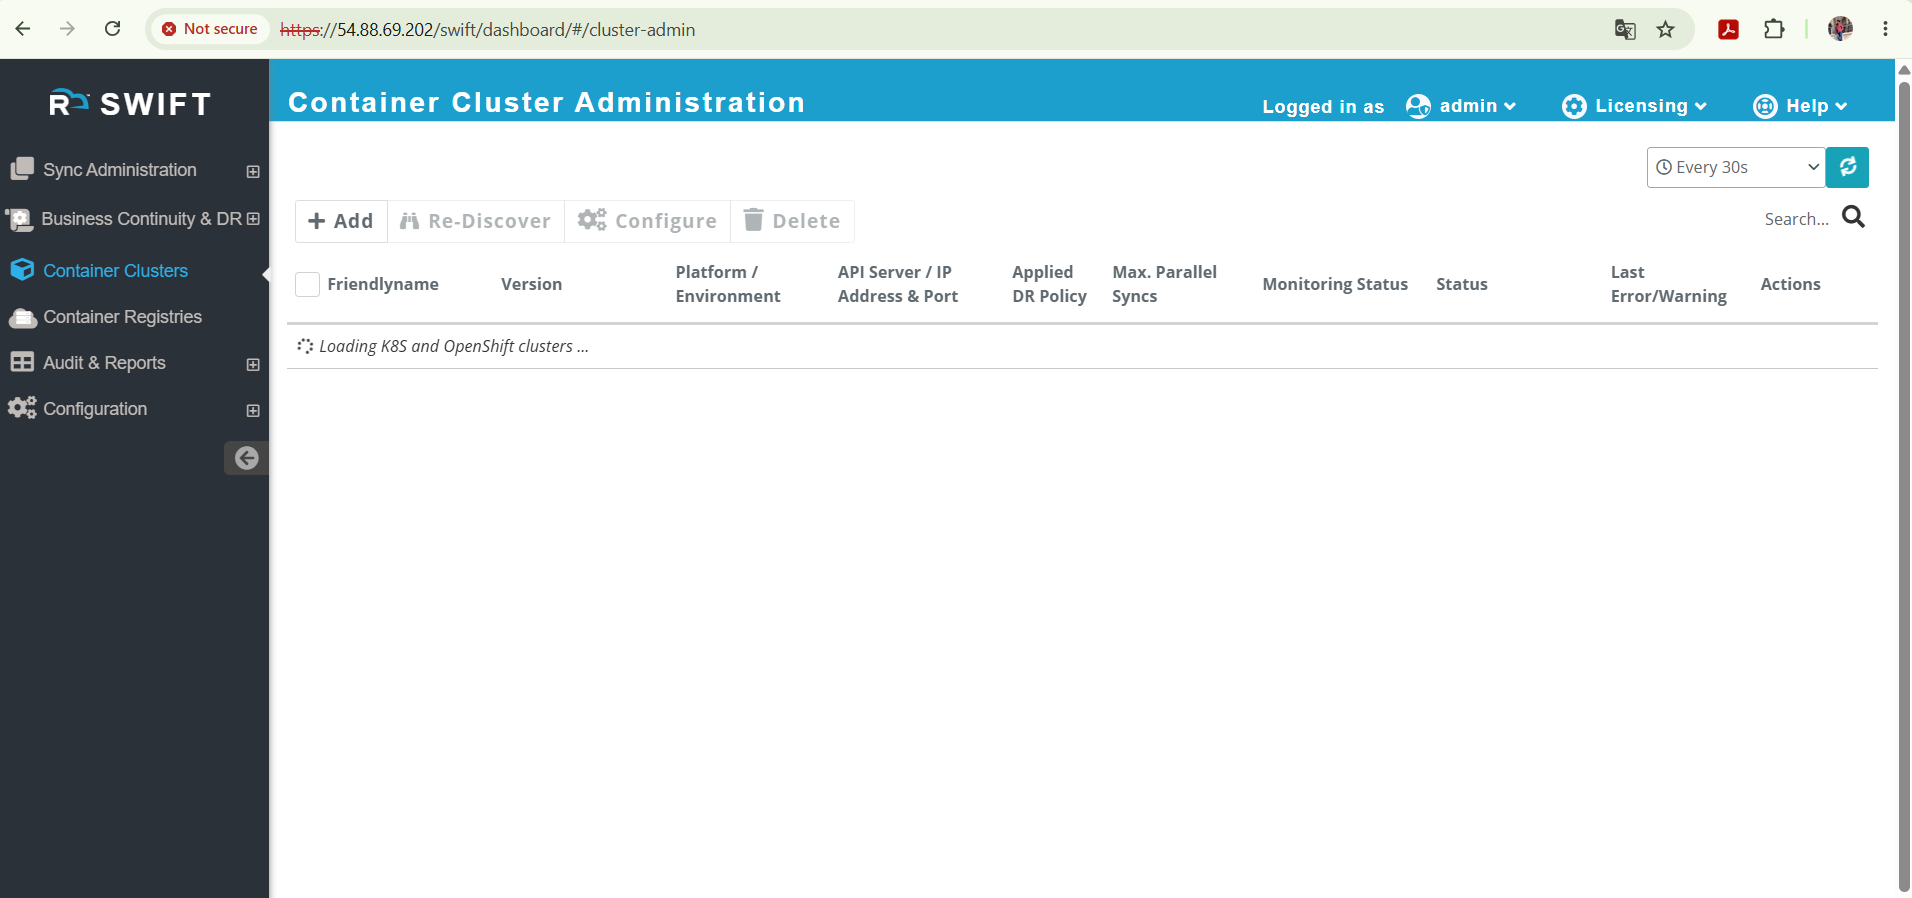
10. Once you access the SWIFT dashboard, log in with your credentials. You will be directed to the container cluster page. Please see the screenshot below for reference.
11. Once you are here, now time to activate your SWIFT! If you are using DR or Migration-Subscription instance then your SWIFT is already pre-activated and ready to go (Billing is Pay-as-you-go). If you are using BYOL instance, then by default SWIFT is pre-activated with free Migration trial licenses and ready to use too. If you want to convert/extend SWIFT trial licenses to production licenses on your BYOL instance, then use this below KB link to find steps on how to do that.
https://rackware.freshdesk.com/support/solutions/articles/5000888707
#Next
12. Once the license is in place, you can add the cluster in SWIFT and start the replication. For detailed guidance, please refer to the KB article linked below. Additionally, you can refer to the Operations Guide, which is available for download from the dashboard.
How to add cluster: https://rackware.freshdesk.com/a/solutions/articles/5000897693
Replication in SWIFT: https://rackware.freshdesk.com/a/solutions/articles/5000891530
Replication by applying DR Policy for Passthrough sync: https://rackware.freshdesk.com/support/solutions/articles/5000898567
Replication by applying DR Policy for Stage1 sync: https://rackware.freshdesk.com/a/solutions/articles/5000898582
Replication by applying DR Policy for Stage1+2 sync: https://rackware.freshdesk.com/a/solutions/articles/5000898586